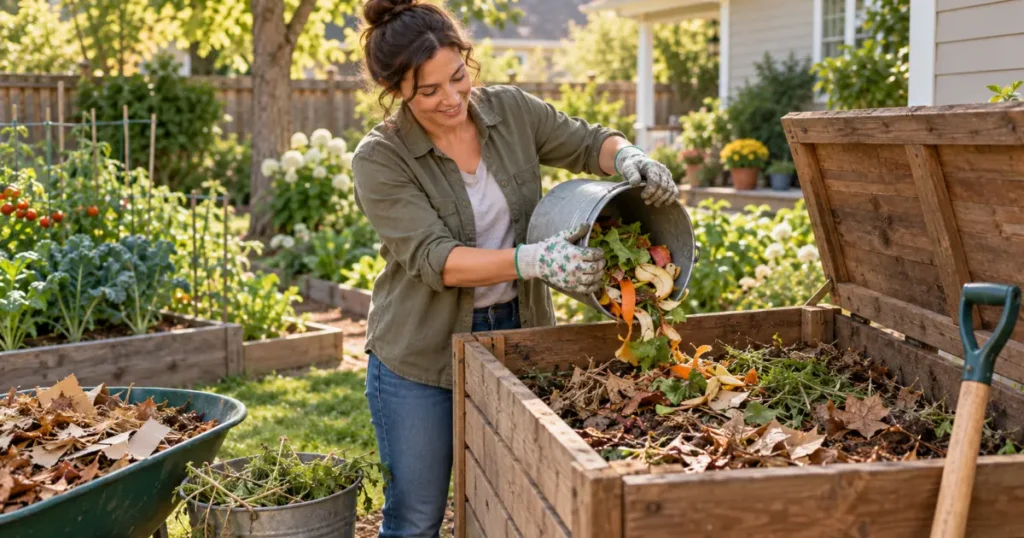
How to start composting with leaves and kitchen scraps in a backyard compost bin

How to Start Composting: A Beginner’s Step-by-Step Guide

Composting can sound more technical than it really is. You may have heard about “greens,” “browns,” carbon-to-nitrogen ratios, turning schedules, moisture levels, and compost temperatures before you have even saved your first handful of kitchen scraps.

For a beginner, the useful version is much simpler. Composting is the controlled breakdown of organic materials by microorganisms. Give those organisms a useful mixture of carbon-rich and nitrogen-rich materials, enough moisture, and enough air, and they can gradually turn many kitchen and yard materials into finished compost.

If you are learning how to start composting, you do not need expensive equipment or a perfectly calculated recipe. You need a suitable place, a manageable system, appropriate materials, and a basic understanding of what to observe as the pile changes.

This guide walks you through choosing a setup, deciding where to put it, understanding browns and greens, starting your first compost, maintaining it, handling basic problems, and recognizing when the compost is finished.

Quick Summary

  • Start with a simple outdoor bin or pile you can reach easily and maintain comfortably.
  • Build your compost from both browns (carbon-rich materials) and greens (nitrogen-rich materials).
  • Keep the mixture moist but not waterlogged and allow air to move through it.
  • Cover fresh food scraps with browns to help reduce odors and unwanted animal attention.
  • Turn or mix when useful for aeration, but do not rely on a rigid turning schedule.
  • Watch the compost itself: moisture, smell, texture, volume, and decomposition tell you more than a calendar.
  • Finished compost should be dark, crumbly, earthy-smelling, and largely unrecognizable from the materials you started with.

What Is Composting and How Does It Work?

Composting is managed aerobic decomposition: microorganisms break down organic material in the presence of oxygen. They use carbon-rich materials for energy, nitrogen-rich materials for growth, moisture for biological activity, and oxygen for respiration. The result is a biologically more stable material we call compost.

The U.S. Environmental Protection Agency describes finished compost as a soil amendment, rather than simply calling it soil. Its guidance on composting at home also identifies carbon-rich materials, nitrogen-rich materials, moisture, and oxygen as fundamental ingredients of the process.

You do not need to see the organisms doing the work. Bacteria, fungi, and other decomposers act on the materials as conditions allow. Your job is mainly to create a reasonably favorable environment and make simple adjustments when something is obviously out of balance.

The Four Basics: Browns, Greens, Moisture, and Air

Think of beginner composting around four practical components:

Browns are mainly carbon-rich materials, such as dry leaves, shredded plain cardboard, small woody pieces, and some dry plant material.

Greens are mainly nitrogen-rich materials, such as fruit and vegetable scraps, fresh grass clippings, and coffee grounds.

Moisture allows microorganisms to function, but excessive water can fill air spaces and create low-oxygen conditions.

Air is essential because ordinary backyard composting is an aerobic process. Loose structure, coarse materials, and occasional turning or mixing can all help maintain oxygen flow. The EPA’s overview of composting approaches explains the role of oxygen, moisture, particle size, and material balance in decomposition.

You may see precise carbon-to-nitrogen numbers in technical composting information. A beginner does not need to calculate the chemistry of every banana peel and handful of leaves. What matters initially is learning to combine browns and greens and then adjusting according to what you observe.

Why Compost at Home?

Once you understand how to start composting, home composting gives you a practical way to recycle suitable food scraps and yard materials into something useful for garden soil instead of treating all of those materials as waste.

The EPA’s home-composting guidance notes that home composting can divert food scraps and yard trimmings from disposal while producing a soil amendment that contributes organic matter and can improve soil properties.

That does not mean every biodegradable product belongs in a backyard compost pile. Home composting and large commercial composting facilities operate under different conditions and may accept different materials. We will come back to that distinction below.

What Do You Need to Start Composting?

One reason composting for beginners can seem expensive is that composting equipment is heavily marketed. Most beginners need much less than the product shelves suggest.

Essential Materials

For a basic outdoor compost system, you need:

  • A suitable space for a pile or compost bin.
  • A supply of browns, such as dry leaves or shredded plain cardboard.
  • A supply of greens, such as vegetable and fruit scraps or fresh plant material.
  • Moisture when needed, usually from naturally moist ingredients, rainfall, or added water.
  • Airflow, supported by the structure of the pile and, where useful, mixing or turning.

If you use a bin, you obviously also need the bin itself. If you use an open pile, no specialized container is necessary.

It is helpful to establish a steady supply of browns before you begin. Kitchen scraps arrive throughout the year, but dry leaves may be seasonal. Keeping a bag, covered container, or other dry store of brown material makes it much easier to cover new food scraps and correct an overly wet pile.

Helpful Tools That Are Optional

A few ordinary garden items can make the job easier:

  • a garden fork for turning;
  • a shovel;
  • pruning shears for reducing larger garden material;
  • a kitchen scrap container;
  • gloves if you prefer using them;
  • a hose or watering can nearby.

A compost thermometer can be interesting and useful for gardeners intentionally managing a hot pile, but a beginner does not need a thermometer to make compost.

You also do not need a compost accelerator simply because you are starting. Appropriate organic materials already bring microorganisms into the system.

Compost Bin or Compost Pile: Which Should You Start With?

Both an open pile and a bin can produce compost. The better beginner choice depends more on your property, materials, space, appearance preferences, wildlife pressure, and how you want to manage the system than on one method being universally superior.

Open Compost Pile

Often useful when: You have adequate outdoor space, a steady supply of yard material, and want a simple, low-equipment system.

An open pile is easy to access, allows bulky materials to be added readily, and can be turned with a garden fork when needed. You can begin without buying a container.

Main consideration: An open pile is less contained. It may look untidy in a small yard, food scraps need to be managed carefully, and an enclosed system may be more practical where rodents or other animals are a significant concern.

Compost Bin

Often useful when: Containing materials, saving space, keeping the compost area visually tidy, or improving animal exclusion is particularly important.

A bin gives the compost a defined footprint and can make the system easier to contain. A suitably secure design may help with animal management, although owning a bin does not guarantee that pests will never investigate it.

Main consideration: Bins vary widely in design. Some are open at the bottom, some are enclosed, and some rotate. You do not need to build a complicated homemade structure to start composting.

A Simple Beginner Choice

Choose an open pile if you have enough yard space, plenty of garden material, and want the simplest low-equipment system.

Choose a bin if containing the material, saving space, appearance, or animal exclusion is particularly important.

Whichever you choose, prioritize a system you can actually access, add material to, inspect, and maintain.

Where Should You Put Your Compost?

The best compost location is practical rather than perfect.
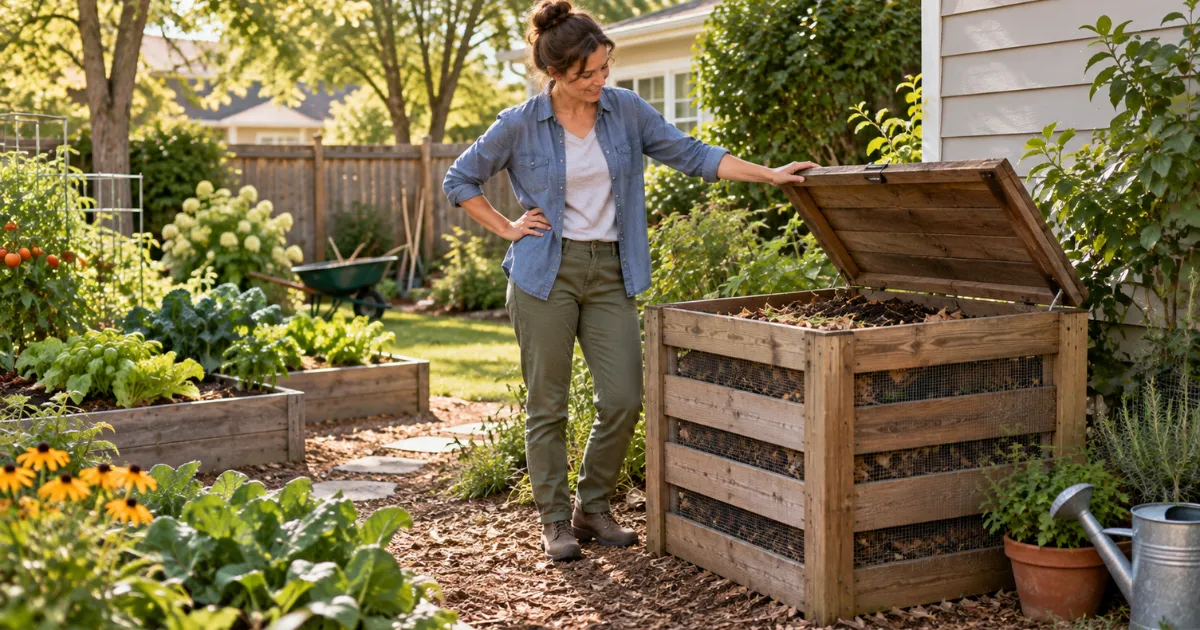
Gardener choosing a practical location for a backyard compost bin

Drainage, Access, and Water

Choose a location with reasonable drainage. A compost area that repeatedly sits in standing water can become too wet and oxygen-poor.

Accessibility matters too. If the pile is inconvenient to reach from the kitchen or garden, routine additions become more difficult. A water source somewhere nearby is useful for dry periods, but the compost does not need to sit directly beside a faucet.

The EPA recommends an accessible location with good drainage and a water source nearby in its backyard composting setup guidance.

Sun or Shade?

Your compost does not have to occupy one universally prescribed light condition.

A pile can decompose in sun or shade. Sun may warm a system but can also increase drying; shade may reduce drying but is not inherently necessary for decomposition. Your climate, exposure, rainfall, and the system itself all affect conditions.

The practical priority is being able to maintain suitable moisture and access, not finding a mythical perfect number of sunlight hours.

Avoiding Poor Locations

Try not to place the compost where:

  • water regularly collects;
  • access becomes difficult in wet or cold weather;
  • you cannot conveniently add materials;
  • it interferes with neighbors or property use;
  • an open pile sits immediately against a structure where access and airflow become awkward.

Also check local rules where relevant. Municipal regulations, homeowners’ association requirements, wildlife concerns, and restrictions on compost systems can vary.

What Can You Put in Your Compost?

This beginner guide does not need an encyclopedia of every possible compost ingredient. A dependable starter selection is more useful. The simplest approach is to think in terms of browns and greens.

Browns — Carbon-Rich Materials

Useful beginner examples:
  • dry leaves
  • shredded plain cardboard
  • shredded uncoated brown paper bags
  • small twigs and plant stalks
  • untreated wood chips

Greens — Nitrogen-Rich Materials

Useful beginner examples:
  • fruit and vegetable scraps
  • coffee grounds and paper filters
  • fresh grass clippings
  • fresh green garden trimmings
  • crushed eggshells

The terms can be misleading at first: “green” does not literally mean the material must be green, and “brown” does not mean every brown-colored object belongs in compost. They describe the material’s general role in the compost mixture.

The EPA’s current backyard composting materials guidance includes dry leaves, untreated wood chips, shredded uncoated cardboard and paper among browns, and fruit and vegetable scraps, coffee grounds, grass clippings, and eggshells among suitable additions.

Why You Need Both

A pile made mostly from wet food scraps or fresh grass can become dense, wet, and smelly. A pile made mostly from dry woody or leafy material may decompose very slowly.

The goal is balance, not mathematical perfection.

As a starting rule of thumb, EPA suggests using roughly two to three volumes of browns for each volume of greens in a backyard pile. Treat that as practical guidance rather than a universal formula: materials vary substantially, and your pile’s moisture, smell, and decomposition will tell you whether adjustment is needed. The ratio appears in the EPA’s home-composting instructions.

What Beginners Should Avoid

For an ordinary backyard compost pile, it is generally sensible to avoid:

  • meat, fish, and bones;
  • dairy products;
  • fats, oils, and grease;
  • pet feces and cat litter;
  • treated or painted wood;
  • glossy or coated paper;
  • produce stickers and other plastics;
  • plants known to have been treated with persistent herbicides;
  • heavily diseased or pest-infested plant material where home compost conditions may not reliably neutralize the problem;
  • mature seed-heavy aggressive weeds when you cannot ensure conditions sufficient to destroy seeds.

Some items sold as “compostable,” including certain food-service products and bags, are designed for industrial composting conditions rather than ordinary backyard piles. Check the product and your local compost facility rather than assuming a compostable label means it belongs in your home system. The EPA’s backyard materials guidance makes the same distinction between materials appropriate for backyard systems and those better suited to commercial facilities.

How to Start Composting Step by Step

If you’re learning how to start composting, this is the part to use while setting up your first system.

Step 1: Collect Your Browns and Greens

Begin by collecting enough material to create a useful mixture.

Save dry leaves, plain shredded cardboard, or another suitable brown material. At the same time, collect suitable greens such as vegetable scraps, coffee grounds, or fresh garden material.

You do not need to wait until you have an enormous quantity. What matters is having enough browns available that you are not forced to build a wet pile made almost entirely from kitchen scraps.

A covered kitchen container can make food-scrap collection convenient. Empty it regularly rather than leaving food scraps sitting indoors indefinitely.

Step 2: Prepare the Materials

Break very large or tough materials into smaller pieces where practical.

Smaller pieces expose more surface area to microorganisms and usually decompose more readily. Large woody pieces can still have value because they create spaces for air, so the goal is not to pulverize everything into a dense paste.

Chop thick plant stems, tear cardboard, and break oversized scraps into manageable pieces. The EPA’s composting-process guidance likewise notes that particle size influences decomposition.

Step 3: Build the Base

Start with a loose layer of coarse brown material.

Dry stalks, small twigs, wood chips, or similarly structured browns can help create air spaces toward the bottom of the pile and reduce the chance of beginning with a dense, wet mass.

You do not need to measure a universally exact base thickness. The practical goal is simply a loose, carbon-rich foundation that supports airflow and absorbs some moisture.

Gardener mixing dry leaves and green materials in a backyard compost pile

Step 4: Add Browns and Greens

Add a mixture of brown and green materials.

You may alternate them loosely as you build, or mix them together as you go. Composting does not require perfectly striped “lasagna” layers.

Use more browns than greens by volume as a reasonable beginner starting point, then respond to what the pile tells you. If fresh food scraps are exposed at the surface, cover them with a generous layer of browns. This helps absorb moisture and reduces odors and easy access for flies and animals.

Do not worry about achieving a laboratory-perfect carbon-to-nitrogen ratio.

Step 5: Check the Moisture

Pick up a handful from within the mixture, if it is safe and comfortable to do so.

The compost should generally feel evenly damp rather than dusty-dry or dripping wet. The familiar comparison is a wrung-out sponge: moist enough to support decomposition but not saturated.

The University of Maryland Extension composting guide uses this same practical moisture comparison.

Fresh kitchen scraps and grass can already contain substantial moisture, so do not automatically add water every time you add material.

If the mixture feels dry, add water gradually and distribute it through the materials. If it feels soggy, do not add more water; mix in dry browns and improve aeration instead.

Step 6: Make Sure the Pile Gets Air

Composting organisms need oxygen.

A varied pile containing both fine and coarse material naturally has some air spaces. You can increase aeration by loosening compacted material or turning the pile.

Turning is useful, but there is no mandatory schedule that every home composter must follow. More active turning generally speeds decomposition; a less frequently turned pile can still break down, only more slowly when other conditions are adequate. The EPA’s composting-process overview identifies turning and maintaining adequate airflow as useful parts of aerobic composting.

At this point, you have started your first compost system.

How to Maintain Your Compost

Once the pile exists, maintenance is mostly observation and adjustment.

Adding New Materials

Continue adding suitable household and garden materials as they become available.

Whenever you add moist, nitrogen-rich food scraps, add or cover them with browns. Keeping dry brown material nearby makes this habit much easier.

Bury or cover food scraps rather than leaving them on the surface. This can reduce odors, flies, and animal interest.

If your active pile eventually becomes difficult to manage because fresh materials are constantly being added while older material is trying to finish, you can stop adding to that batch and begin a second pile or bin. That allows the first batch to finish decomposing.

Keeping the Moisture Right

Do not water compost according to a calendar.

Check conditions instead.

Rainfall, heat, wind, the type of bin, the proportion of food scraps, and the materials themselves all influence moisture. An uncovered pile during a wet period may need protection or additional browns; a dry pile in hot weather may need water.

If the center feels dry and decomposition has slowed, moisten it gradually while mixing.

If the pile is heavy, soggy, or unpleasant-smelling, add dry browns and create more air space.

When to Turn or Mix the Compost

Turn when it serves a purpose.

Useful reasons include:

  • redistributing wet and dry material;
  • mixing newly added ingredients;
  • opening a compacted pile;
  • correcting an odor associated with low oxygen;
  • speeding decomposition when you want a more actively managed system.

A pile does not fail simply because you did not turn it every Tuesday.

More frequent management can accelerate composting, while passive systems take longer. Choose the amount of labor that fits your goals.

What Changes You Should Expect

Over time, recognizable materials begin to soften, collapse, darken, and lose volume.

You may notice temporary warmth inside the pile, especially after adding a useful mix of fresh greens and browns. You may also see fungi, insects, and other decomposer activity.

A pile does not have to become extremely hot to decompose. Hot composting can accelerate breakdown and, when managed under suitable conditions, can help reduce some weed seeds and pathogens. Lower-temperature composting also occurs; it simply behaves differently and is generally slower. The EPA’s explanation of composting approaches describes temperature as one factor affecting the process rather than a requirement that every home pile reach high heat.

That distinction matters when deciding what materials are appropriate for an ordinary backyard pile.

How Do You Know Your Compost Is Working?

Beginners sometimes assume a compost pile is failing if they cannot see steam.

Heat is only one possible sign.

Look for several changes together:

  • the pile gradually loses volume;
  • leaves and soft plant material begin breaking apart;
  • ingredients darken;
  • recognizable scraps become harder to identify;
  • the material starts developing a more uniform texture;
  • the smell becomes earthy rather than like fresh food waste;
  • the center may become warmer during periods of active decomposition.

The speed and intensity of these changes vary.

A cold pile in winter, a small bin, or a passively managed pile may change slowly. That does not automatically mean nothing is happening.

The more useful question is whether the material is gradually decomposing without persistent signs of severe imbalance, such as continual foul odor or waterlogging.

Common Composting Problems for Beginners

Most early compost problems are not reasons to throw everything away. Start with the simplest likely cause and first response.

Compost Smells Bad

Likely basic cause: Too much wet or nitrogen-rich material, compaction, or insufficient air.

First practical response: Mix in dry browns and gently turn or loosen the pile.

A rotten or unpleasant smell often indicates that conditions have become too wet or oxygen-poor. Oregon State University Extension’s compost troubleshooting guidance recommends adding dry brown material and increasing aeration as an initial response.

Compost Is Too Wet

Likely basic cause: Heavy rain, too many wet greens, poor drainage, or insufficient absorbent material.

First practical response: Add dry browns, mix gently to open air spaces, and address excess rain or drainage if necessary.

Do not try to correct a soggy pile by simply turning it repeatedly without adding material that helps absorb moisture and restore structure.

Compost Is Too Dry

Likely basic cause: Dry weather, too many dry browns, or insufficient moisture.

First practical response: Add water gradually while mixing, and reassess.

Do not flood the pile. You are aiming for evenly moist material, not standing water.

Compost Isn’t Breaking Down

Likely basic cause: The pile may be too dry, heavily dominated by browns, made from very large materials, too compacted, or simply operating slowly because of cool conditions or low management.

First practical response: Check moisture first, then inspect the material mix and airflow.

Do not assume a slow pile automatically needs fertilizer, additives, or a commercial compost starter.

Pests Are Visiting the Pile

Likely basic cause: Exposed food scraps, inappropriate food materials, or a system that gives animals easy access.

First practical response: Stop adding meat, dairy, fats, and other problematic foods; bury suitable food scraps within the pile and cover them thoroughly with browns.

Where rodents or other animals are persistent, a more secure bin may be appropriate. The EPA’s guidance on avoiding rodents in home compost also emphasizes secure containment, covered food scraps, and avoiding animal-attracting foods.

No composting method can guarantee that wildlife or insects will never investigate an outdoor pile.

How Long Does Compost Take?

There is no single correct completion time.

Composting speed is influenced by:

  • the materials you use;
  • particle size;
  • moisture;
  • oxygen;
  • the balance of browns and greens;
  • pile volume;
  • temperature and season;
  • how frequently you mix or turn it;
  • whether you continually add fresh materials.

As a rough example rather than a promise, EPA says a well-maintained backyard pile may produce finished compost in roughly three to five months, while a largely untended pile may take around a year. See the EPA’s home-composting completion guidance.

Your compost could be faster or slower.

A gardener in a warm climate with an actively managed pile will not necessarily have the same experience as someone using a small passive system through a cold winter.

Instead of counting days, watch how the material changes.

How to Tell When Compost Is Finished

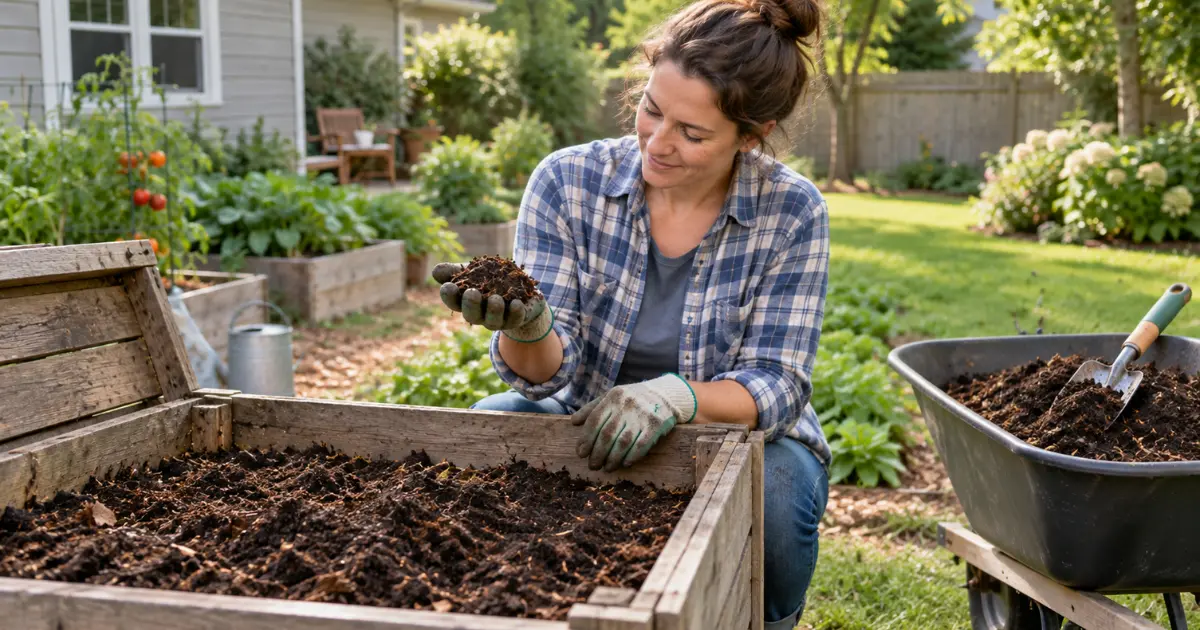
Gardener holding dark crumbly finished compost beside a backyard compost bin

Finished compost should be judged by several indicators together.

Look for material that is:

Dark: The mixture has become much darker and more uniform than when you started.

Crumbly: The texture resembles loose, broken-down organic matter rather than a pile of identifiable kitchen and garden scraps.

Earthy-smelling: Finished compost should smell pleasant and earthy rather than sour, rotten, or strongly like its original ingredients.

Mostly unrecognizable: Most soft starting materials should no longer be identifiable. Tough twigs, fruit pits, eggshell fragments, and other slow materials may remain and can be screened out or returned to the next pile.

No longer actively changing rapidly: Mature material should not immediately return to vigorous heating after being mixed simply because substantial undecomposed material remains.

The EPA’s guidance on harvesting finished compost uses dark color, loose crumbly texture, earthy smell, and substantial decomposition of the original materials as practical indicators.

Do not decide that compost is finished solely because a certain number of weeks or months has passed.

And remember: finished compost is principally a soil amendment, not ordinary garden soil and not a guaranteed complete fertilizer.

Beginner Composting Mistakes to Avoid

  1. Starting Without a Supply of Browns
    Saving kitchen scraps is easy. Finding dry carbon-rich material after the pile has become a wet, smelly mass is harder. Keep browns available from the beginning.
  2. Adding Mostly Food Scraps
    A bucket of fruit and vegetable scraps is not a balanced compost pile by itself. Combine moist greens with plenty of carbon-rich material.
  3. Leaving Food Scraps Exposed
    Fresh food on top of a pile is easier for flies and animals to find. Bury or cover suitable food scraps with browns.
  4. Treating a Ratio as an Exact Formula
    Rules of thumb are useful starting points, not universal recipes. Different leaves, wood products, food scraps, and plant materials have different properties. Learn to use smell, moisture, texture, and decomposition as feedback.
  5. Watering Automatically
    Kitchen scraps, fresh grass, and rainfall may already supply plenty of moisture. Check before adding water.
  6. Letting the Pile Become Waterlogged
    Too much water reduces the air available to aerobic decomposers. Add dry material and restore structure rather than simply waiting for a saturated pile to correct itself.
  7. Assuming You Must Turn on a Fixed Schedule
    Turning can increase aeration and speed decomposition, but home systems differ. Turn for a reason rather than because a calendar says you have failed if you missed a particular day.
  8. Believing Compost Must Get Very Hot
    A hot pile can be desirable for particular management goals, but lower-temperature decomposition still occurs. Do not conclude that a pile is dead simply because it never reaches hot-composting temperatures.
  9. Adding Anything Labeled “Biodegradable” or “Compostable”
    Backyard compost systems cannot necessarily process the same materials as commercial facilities. Check the material before adding it.
  10. Using Time Alone to Decide the Compost Is Finished
    Three months of poorly decomposed scraps are still poorly decomposed scraps. Judge readiness from the material itself.

What Should You Do With Finished Compost?

Once your compost is mature, it can move from the compost system into your gardening routine.

Finished compost can be used as an organic soil amendment in appropriate garden situations, helping add organic matter to soil. Exactly how much to use, where to apply it, and how to incorporate it depends on the garden and is a separate subject.

For now, the important point is that compost should be fully finished before you rely on it around plants, and it should not be treated as a complete replacement for garden soil or as a guaranteed complete fertilizer.

Frequently Asked Questions About Starting Composting

What do I need to start composting?

If you’re learning how to start composting, you need surprisingly little: suitable brown and green materials, adequate moisture, airflow, and a practical place to manage the pile or bin.

Kitchen scraps can supply useful green material, but a backyard compost pile also needs carbon-rich browns and enough structure for airflow. Starting with food scraps alone is more likely to produce excessive moisture, odors, and pest problems.

Keep dry leaves, shredded plain cardboard, or another appropriate brown material available and add them alongside kitchen scraps.

No. An open pile and a bin can both work.

A bin can be useful where space, tidiness, containment, or wildlife management matters. An open pile can be simple and inexpensive where you have sufficient space and yard material.

No universal sun requirement applies.

Backyard compost can break down in sun or shade. Choose a location based mainly on drainage, access, moisture management, and what is practical for your property.

There is no mandatory universal schedule.

Turning introduces air, redistributes moisture and materials, and can speed decomposition. Turn when your management method or pile conditions make it useful. A less frequently turned system can still compost, though generally more slowly.

A functioning pile may have mild organic or earthy odors, but a persistent rotten smell usually suggests a problem such as excessive moisture or inadequate oxygen.

A useful first response is often to add dry browns and increase aeration.

In many climates, yes, although decomposition can slow substantially when temperatures fall.

You can continue adding appropriate materials if your system allows it. Activity generally increases again when conditions become more favorable. What winter management looks like depends on climate, system type, snowfall, and local conditions.

No.

Ordinary backyard aerobic composting does not require you to buy or add worms. Worm composting, or vermicomposting, is a different composting method and can be useful in some circumstances, including situations where outdoor space is limited.

Start With a Simple System and Learn From It

Learning how to start composting is mostly about understanding a few relationships rather than memorizing a complicated formula.

Combine suitable browns and greens. Keep the mixture moist without saturating it. Maintain enough structure and air for aerobic decomposition. Cover food scraps. Then observe what happens.

If the pile smells, check moisture and airflow. If it is dry, add moisture. If decomposition is slow, examine the material mix, particle size, moisture, and aeration before assuming you need a special product.

Your first compost system does not need to be perfectly optimized. It needs to be manageable enough that you can maintain it and learn from the changes you see.

Start by gathering a dependable supply of browns and greens, choose a practical location, and build your first batch from there.

Leave a Comment

Your email address will not be published. Required fields are marked *

Scroll to Top