
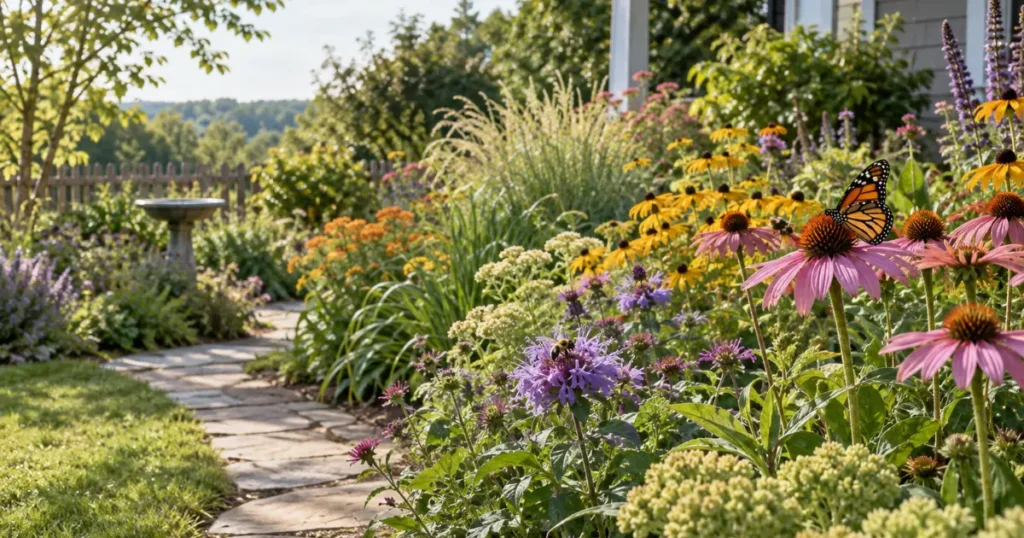
A pollinator garden is more than a flower bed that happens to attract a few bees. Done well, it provides food, shelter, nesting opportunities, and other useful resources for a range of pollinating insects and animals while still functioning as an attractive part of your home landscape.
You do not need a large property or a complicated design to get started. What matters more is choosing plants that suit your climate and site, providing flowers across as much of the growing season as practical, and avoiding maintenance practices that unintentionally remove food or habitat.
This guide walks through the process from the beginning: choosing a location, assessing your site, selecting plants, arranging them, establishing the planting, and maintaining it over time.
The goal is not to create a perfect wildlife sanctuary overnight. It is to build a garden that becomes increasingly useful to pollinators while remaining realistic for you to manage.
Quick Summary
- A successful pollinator garden provides more than flowers: food, shelter, nesting habitat, water, and thoughtful maintenance all matter.
- Choose plants for your actual climate, sunlight, soil, moisture, and available space rather than relying on a universal plant list.
- Include overlapping bloom periods so pollen and nectar are available across as much of the local growing season as practical.
- Plant diversity matters because different pollinators use different flowers and habitat resources.
- Locally native plants can be especially useful, but they still need to match the conditions in your particular garden.
- Leave some natural habitat, such as suitable stems, leaves, or small areas of bare ground, where it can be done safely and neatly.
- Use pesticides only when justified, follow the label, and minimize pollinator exposure.
- Even a small border or group of containers can contribute useful forage when the plants are chosen carefully.
Table of Contents
ToggleWhat Is a Pollinator Garden?
A pollinator garden is a planted area managed to provide useful resources for animals that move pollen between flowers.
Flowers supplying pollen or nectar are an important part of that habitat, but flowers alone do not tell the whole story. Pollinators may also need host plants for immature life stages, places to nest or overwinter, protection from severe weather, access to water, and a landscape managed in ways that reduce unnecessary disturbance and pesticide exposure.
That means a useful planting can include more than showy perennial flowers. Depending on the region and site, flowering shrubs and trees, grasses, sedges, herbs, groundcovers, annuals, and other vegetation may all have a role.
A garden does not need to look wild or neglected to provide habitat. You can still use clear bed edges, paths, intentional plant groupings, and other conventional landscape features while leaving selected areas less disturbed.
The key is to make the planting functionally diverse as well as attractive.
Which Pollinators Can a Garden Support?
Honey bees are only one part of the picture.
Depending on where you live, flower visitors and pollinators may include native bees, bumble bees, butterflies, moths, flies, beetles, and other insects. Some flowers are also pollinated by birds such as hummingbirds, while other pollinating animals occur in particular regions.
The USDA’s overview of pollinators and their diversity describes a broad range of insect pollinators, including bees, butterflies, moths, flies, and beetles.
Different species do not all use flowers in the same way. Body size, tongue length, activity season, life cycle, and flower structure can affect which resources are useful.
This is one reason diversity in bloom shape, timing, and plant form is more valuable than filling an entire bed with one ornamental variety.
Why Pollinator Gardens Matter
A home garden will not solve every challenge facing pollinating species, but it can contribute useful food and habitat within a wider landscape.
Food and Habitat for Pollinators
Adult pollinating insects often use flowers for nectar, pollen, or both. Providing a succession of flowering plants can help reduce periods when those resources are scarce.
Some insects also depend on particular plants during their larval stages. Butterflies and moths, for example, may require host plants that their caterpillars can eat even when the adult insects visit a much wider range of flowers.
Habitat matters beyond feeding.
Ground-nesting bees need appropriate soil surfaces. Other bees may use hollow or pithy plant stems or existing cavities. Butterflies, moths, beetles, and other insects may overwinter in leaf litter, vegetation, stems, or other protected places.
University of Minnesota Extension notes that natural nesting habitat can include hollow stems, areas of bare ground, leaves, and brushy material, depending on the bee species involved. See the University of Minnesota’s guidance on pollinator nesting habitat
If sunflowers are part of your pollinator planting, our guide to sunflower companion plants explains how to combine them with other flowers and plants while accounting for bloom diversity, sunlight, spacing, and mature size.
Benefits for Your Garden and Local Ecosystem
Pollination supports seed and fruit production in many flowering plants, including some garden food crops.
A diverse planting can also increase structural variety in the landscape. Flowers, grasses, shrubs, leaf litter, stems, and small undisturbed patches may provide resources for pollinators as well as other beneficial insects.
There can be practical gardening benefits too. Replacing part of a low-diversity landscape with well-adapted plants may create a more seasonally interesting garden and provide more ecological function without requiring the yard to become unmanaged.
The scale can be modest. A useful habitat patch does not need to occupy an entire property.
What Does a Pollinator Garden Need?
A productive pollinator garden works best when several basic needs are considered together rather than focusing only on flower color.
A Suitable Sunny Location
Many flowering plants commonly used by pollinators bloom most strongly in sunny conditions, and open sunny areas can support a wide choice of species.
But full sun is not a universal requirement.
A partially shaded or woodland-edge garden can still provide valuable resources when you choose plants adapted to those conditions. The important question is not whether the site meets one fixed sunlight rule; it is whether the plants you choose match the light actually available.
Observe the area over the day before planting. Buildings, fences, trees, and seasonal changes in the sun’s path can all affect exposure.
Flowers Across the Growing Season
A garden that flowers heavily for two weeks and then offers little for the rest of the year is less useful than one with overlapping bloom periods.
Aim for a sequence that includes locally appropriate early-, middle-, and late-season flowers.
Oregon State University Extension recommends providing pollen and nectar sources throughout the growing season, and its pollinator-habitat guidance emphasizes a diverse mixture of flowering plants. Read Oregon State Extension’s guidance on native pollinator habitat
Exact bloom periods vary by climate and species, so choose plants using regional information rather than a national calendar.
Plant Diversity and Native Plants
Different flower structures can accommodate different visitors. Combining open, flat flower clusters with tubular flowers, spikes, composite flowers, shrubs, and other forms can expand the range of resources available.
Locally native plants deserve particular consideration because many have ecological relationships with regional insects and are adapted to local conditions.
That does not mean every native plant will thrive in every yard or that every nonnative plant is automatically useless. A locally native wetland species may fail in a dry slope, for example.
The USDA Natural Resources Conservation Service emphasizes matching plant species and varieties to the site when establishing pollinator habitat. Explore USDA NRCS pollinator plant-selection guidance
Use regional native-plant societies, Cooperative Extension resources, botanical gardens, and other trustworthy local sources to narrow your choices.
Water, Shelter and Nesting Opportunities
A shallow, manageable water source can supplement the resources in the planting. Depending on your setup, this might be a birdbath or another shallow water feature that can be kept clean and maintained safely.
Avoid creating stagnant, neglected water.
Shelter can come from dense vegetation, shrubs, grasses, protected corners, and existing landscape structure.
For nesting habitat, consider leaving selected areas less intensively managed. Small patches of suitable bare ground may help ground-nesting bees, while standing hollow or pithy stems can provide nesting opportunities for some cavity-nesting species.
You do not have to stop maintaining the entire yard. A few deliberately retained habitat features can coexist with tidy paths and garden edges.
A Safer Approach to Pesticides
Pesticides include insecticides, herbicides, fungicides, and other products used to control pests. Their risks to pollinators vary by active ingredient, formulation, method of application, timing, exposure route, and other factors.
Start by identifying the actual problem before treating it. Cultural controls, hand removal, exclusion, biological controls, or other integrated pest management approaches may sometimes reduce the need for chemical treatment.
If a pesticide is necessary, read and follow the label exactly, including any pollinator-protection directions. Avoid unnecessary applications and take steps to minimize exposure to flowers being actively visited.
University of Minnesota Extension explains that bees can be exposed through direct spray, residues, pollen, nectar, nesting materials, and contaminated water; it also emphasizes following pollinator-protection instructions on pesticide labels. Review University of Minnesota Extension’s pesticide guidance for pollinators
How to Create a Pollinator Garden Step by Step
The strongest way to create a pollinator garden is to plan around the conditions you actually have instead of starting with a shopping list of flowers.
Step 1: Choose the Right Location
Look for an area that can support a useful range of flowering plants without creating an unrealistic maintenance burden.
Check:
- daily sunlight;
- nearby trees and competing roots;
- access to water during establishment;
- drainage;
- visibility and access for maintenance;
- existing vegetation;
- proximity to areas routinely treated with pesticides.
Do not reject a partially shaded yard automatically. If shade is unavoidable, work with shade-tolerant regional plants instead of trying to force sun-loving species into the site. If you are building the garden itself from the beginning, our guide on how to start a garden covers site selection, soil preparation, plant choice, planting, and basic care step by step.
Step 2: Assess the Existing Site and Soil
Before removing vegetation, find out what you already have.
Existing flowering shrubs, trees, groundcovers, or spontaneous plants may already provide useful resources. Identify unknown species before deciding what stays and what goes, particularly if invasive plants could be present.
Look at how the soil drains after rain and whether the bed tends to stay dry, evenly moist, or periodically wet. If your site tends to stay on the dry side, our guide to drought tolerant plants covers 20 choices you can evaluate for different home garden and landscape roles.
A soil test may be worthwhile when fertility, pH, contamination, or a history of poor plant performance is a concern. Follow the testing recommendations of your local Extension program rather than adding amendments automatically.
Step 3: Decide the Garden’s Size and Shape
Start with a size you can realistically plant, weed, water, and maintain.
A narrow border along a walkway, a converted section of lawn, or an expanded existing flower bed can all work.
Shape matters less than functionality.
Give yourself enough access to weed and inspect plants without repeatedly trampling through the middle of the bed. Curving edges can look natural, while simple rectangles or strips may be easier to maintain.
You can enlarge the habitat later.
Step 4: Choose Pollinator-Friendly Plants
Select plants according to:
- your region and hardiness;
- sunlight;
- soil moisture and drainage;
- mature height and width;
- bloom period;
- flower form;
- ecological role;
- maintenance requirements.
Favor locally appropriate species, including native plants where they fit the site.
Avoid buying plants solely because a tag uses terms such as “bee friendly” or “butterfly plant.” Those labels do not replace checking whether the plant suits your region and growing conditions.
Step 5: Plan for Blooms Through the Seasons
Lay out your plant list by expected bloom period before you buy.
If most selections flower at the same time, add plants that cover earlier or later parts of your local season.
The goal is overlap.
A tree or shrub flowering in spring can contribute before summer perennials begin. Late-season asters or other regional fall bloomers may extend forage after many summer flowers fade.
Bloom timing varies geographically, so rely on local references.
Step 6: Plant in Useful Groups
Repeated groups of the same flowering species can create visible patches that pollinators can locate while also making the planting look intentional.
You do not need to arrange every plant in rigid blocks.
Use clusters or drifts where practical, then combine them with plants of contrasting heights, textures, and bloom times.
Penn State Extension recommends planting in groups and providing overlapping bloom periods as part of pollinator-friendly planting. See Penn State Extension’s pollinator-friendly planting guidance
Step 7: Add Water, Shelter and Habitat Features
Look beyond flowers.
A shallow water source, protected vegetation, strategically retained stems, leaf litter, appropriate bare-soil patches, grasses, and shrubs can expand the range of habitat available.
Avoid turning habitat features into hazards or maintenance problems. Keep paths accessible, manage standing water responsibly, and retain woody or brushy material only where it is safe and appropriate for the property.
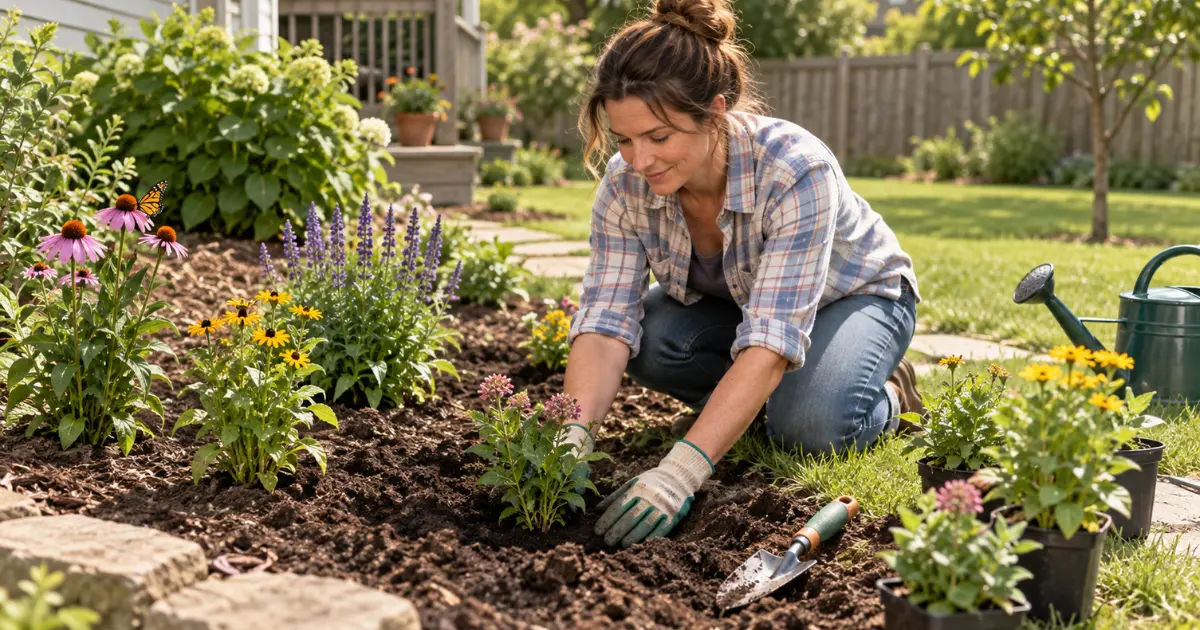
Step 8: Plant and Establish the Garden
Plant according to the needs of the individual species and the appropriate season for your climate.
Water newly installed plants according to actual soil moisture, weather, species, and root development rather than following one universal schedule.
Even drought-tolerant species usually need establishment care before their roots can make full use of the surrounding soil.
Control competing weeds while the planting fills in, replace plants that clearly do not suit the location, and expect the bed to evolve during its first several growing seasons.
How to Choose Plants for a Pollinator Garden
Choosing plants for a pollinator garden is primarily a matching exercise: match the plant to the region, then to the conditions in your yard, and finally to the ecological role you want it to perform.
Start With Plants Suited to Your Region
A plant that supports pollinators in Arizona may be inappropriate for a garden in Maine, Florida, or the Pacific Northwest.
Check:
- USDA hardiness where relevant;
- summer heat and humidity;
- seasonal rainfall;
- soil;
- local pest or disease pressure;
- invasive status;
- the plant’s native range.
Regional Extension programs and locally focused botanical institutions are much more useful for plant selection than one nationwide “best plants” list.
Include Native Plants Where Appropriate
Locally native plants can support relationships that have developed among regional plants, insects, and other wildlife.
Use “native” accurately.
A species native to one portion of the United States should not be presented as native nationwide. When buying plants, verify the species and its regional range rather than relying only on a generic native-plant label.
Native plants still need to suit the site’s moisture, sunlight, soil, and available space.
Combine Different Flower Shapes and Bloom Times
Flower diversity can make resources accessible to a wider variety of visitors.
Consider combining:
- flat or open flowers;
- dense clusters;
- spikes;
- tubular flowers;
- composite daisy-like blooms;
- spring, summer, and fall flowering plants.
You do not need every possible flower type.
Focus on a manageable selection that provides meaningful seasonal overlap and grows well in your conditions. If you need more approachable flower ideas, our guide to easy flowers to grow for beginners covers 18 choices along with their basic light, moisture, drainage, and care needs.
Think Beyond Flowers
Trees, shrubs, grasses, sedges, and other vegetation can add shelter, nesting material, host-plant value, or structural habitat.
A plant may be useful even when its flowers are not especially dramatic.
NRCS notes that native grasses can provide shelter and may serve as larval host plants for some butterflies and skippers. Learn about the habitat value of native grasses from USDA NRCS
Think of the whole landscape rather than treating one flower bed as the only habitat on the property.
Simple Pollinator Garden Layout Principles
A pollinator garden does not require a formal planting plan, but a few layout principles make it easier for both pollinators and gardeners to use.
Group compatible flowers together. Repeated clusters can create more visible patches of bloom and help the bed look cohesive.
Arrange heights sensibly. In a border viewed mainly from one side, taller plants generally work better toward the back, with medium and lower plants toward the front. In an island bed, taller plants may work nearer the center. These are design principles, not rigid rules.
Leave maintenance access. A bed that cannot be weeded or inspected without stepping on plants becomes harder to manage as it matures.
Allow for mature size. Nursery plants can look tiny. Check mature spread before placing them close together.
Include some shelter. Shrubs, bunch grasses, fences, hedges, and existing landscape structure can reduce exposure and create protected spaces.
Avoid unnecessary isolation. A single flowering plant can still be visited, but repeating compatible plants in groups generally creates a stronger visual and foraging patch.
Use the conditions you actually have. Keep sun-loving species in the brighter parts of the bed and reserve shadier pockets for plants adapted to lower light.
The result does not need to look like a meadow. A conventional residential border can support pollinators while retaining a clear, intentional design.
How to Maintain a Pollinator Garden
A pollinator garden changes as plants establish, spread, reseed, mature, and compete with one another. Maintenance should guide that development rather than trying to keep the bed frozen in its first-season appearance.
Water While Plants Establish
New plants need enough moisture to establish healthy root systems.
Check soil moisture and respond to rainfall, temperature, soil drainage, plant type, and establishment stage.
Avoid rigid rules such as watering every two or three days throughout the season. The correct interval can change substantially with weather and soil.
As established plants develop deeper or broader roots, some may need less supplemental irrigation, while moisture-loving species may continue to require more consistent water.
Manage Weeds Without Harming Pollinators
Learn to identify young desirable plants before removing everything unfamiliar.
Hand-pulling, hoeing, mulching selectively, encouraging dense plant cover, and preventing weeds from setting seed may reduce reliance on herbicides.
If chemical control becomes necessary, choose the treatment for the specific weed, follow the product label, and minimize exposure to flowering plants and pollinators.
Leave Some Natural Habitat
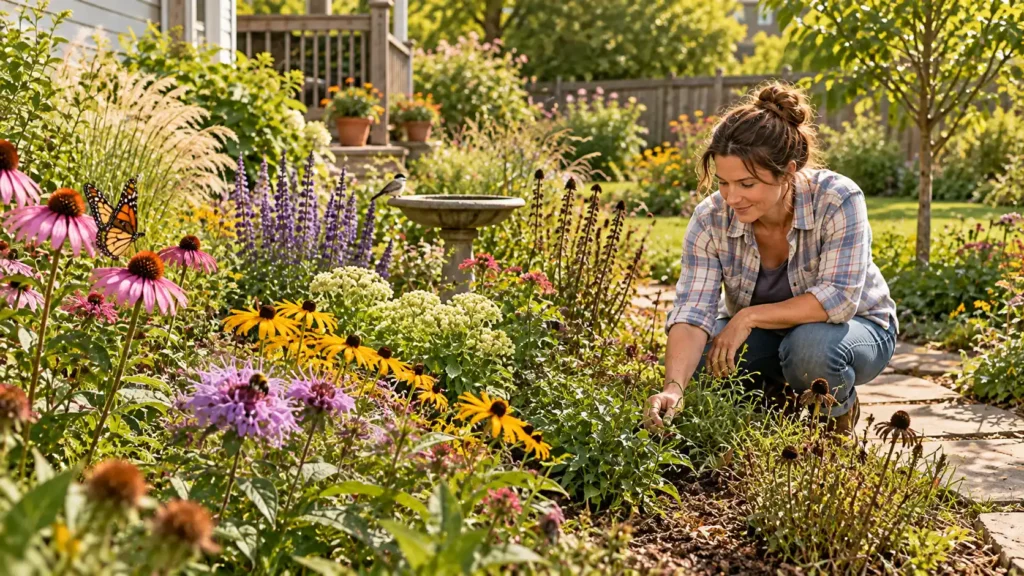
A garden does not need to be completely cut to the ground every fall.
Where practical, retain selected stems, leaf litter, seed heads, or other habitat through winter. Some insects use stems, leaves, soil, and protected plant material for nesting or overwintering.
This does not require letting the entire property become untidy.
Leave habitat strategically, particularly in areas where it will not block paths, smother vulnerable plant crowns, create safety problems, or conflict with local requirements.
Adjust the Garden as It Matures
Watch what succeeds.
If one species repeatedly struggles because the site is too wet, dry, sunny, or shady, replacing it with something better adapted is often more useful than repeatedly trying to correct the environment.
Thin plants that overwhelm their neighbors, fill genuine gaps, and track when different areas flower.
Over time, aim for fewer periods when the planting offers little bloom or shelter.
Common Pollinator Garden Mistakes to Avoid
A pollinator garden can be forgiving, but several common choices reduce its usefulness or make it unnecessarily difficult to maintain.
Relying on too few plant types.
One mass of a single flower may look impressive during bloom but offers limited seasonal and structural diversity. Combine several compatible species instead.
Providing flowers for only a short period.
A summer-heavy planting can leave large gaps earlier and later in the growing season. Review expected bloom periods before purchasing.
Choosing plants that do not suit the site.
A highly recommended pollinator plant will still perform poorly if its sunlight, soil, moisture, or climate requirements are wrong.
Using pesticides without first identifying the problem.
Treating preventively or broadly can expose non-target organisms unnecessarily. Diagnose the pest, consider IPM options, and follow label directions when treatment is justified.
Tidying every habitat feature away.
Removing all stems, leaves, bare soil, and sheltered areas may also remove places insects use for nesting or overwintering.
Assuming every pollinator needs the same thing.
Bees, butterflies, moths, flies, beetles, and other visitors have different life histories and resource needs.
Thinking the garden must be large.
A small, well-chosen planting can still contribute flowers and habitat. Size affects what you can provide, but it does not determine whether starting is worthwhile.
Can You Create a Pollinator Garden in a Small Space?
Yes. A pollinator garden can be scaled to a small yard, narrow border, patio, balcony, or collection of containers.
University of Maryland Extension notes that gardeners do not need a large yard to provide pollinator resources; even a small planting can contribute when it supplies appropriate food and habitat. See University of Maryland Extension’s current pollinator-garden guidance
In a limited space, prioritize quality over quantity.
Choose a few plants that:
- fit the available sunlight;
- grow well in your climate;
- provide useful flowers;
- have complementary bloom times;
- remain appropriately sized.
Containers need closer attention to moisture because their root zones are limited and can dry more quickly than garden soil.
Do not try to reproduce a full meadow or large habitat planting in a tiny area. A compact collection of well-chosen plants is more practical.
Frequently Asked Questions About Pollinator Gardens
What Is the Best Place for a Pollinator Garden?
Choose a location where the plants you want to grow can thrive.
For many flowering species, that means a reasonably sunny area with appropriate soil and drainage, but partially shaded sites can also work with shade-adapted plants.
Consider access to water during establishment, surrounding pesticide use, mature plant size, maintenance access, and existing habitat before choosing the site.
How Big Does a Pollinator Garden Need to Be?
There is no universal minimum size.
A large planting can accommodate greater plant and habitat diversity, but a small border or group of containers can still provide useful flowers and resources.
Start with an area you can maintain successfully. Expanding a thriving small bed later is usually more practical than creating a large planting that quickly becomes difficult to weed and establish.
When Should You Plant a Pollinator Garden?
Planting time depends on your climate and the plants being used.
Hardy perennials, shrubs, seeds, bulbs, and frost-sensitive annuals do not necessarily share the same planting window. Spring and fall are useful planting periods for many perennial species in appropriate regions, but local weather, soil conditions, and winter timing matter.
Follow plant-specific instructions and local Extension recommendations rather than using one national calendar date.
Do Pollinator Gardens Need Native Plants?
No, but locally native plants are often particularly useful and deserve strong consideration.
The best choice is a plant that both supports pollinators and suits your site. Native status alone does not override unsuitable sunlight, moisture, soil, climate, or mature size.
Use regional native-plant resources and avoid invasive species.
Does a Pollinator Garden Need Full Sun?
No.
Many popular nectar- and pollen-producing plants flower best in full sun, so a sunny location can provide more plant options. But shaded and partially shaded gardens can support pollinators when planted with species adapted to those conditions.
Choose plants according to actual light levels instead of trying to force sun-loving plants into shade.
How Do You Provide Water for Pollinators Safely?
Use a shallow water source that can be kept clean and maintained regularly.
A birdbath or shallow dish can work in some gardens. Provide stable landing areas where appropriate and avoid creating deep, stagnant water.
Clean and refresh the feature as needed, particularly during warm weather, and make sure it does not become a neglected mosquito-breeding container.
Can You Make a Pollinator Garden in Containers?
Yes.
Containers can provide nectar, pollen, host plants, and seasonal color in small spaces, provided the plants are appropriate for container growth.
Use containers with adequate drainage, select plants for the available light, and monitor moisture carefully because pots can dry faster than garden soil.
A few complementary containers are enough to get started; you do not need an elaborate patio design.
Conclusion
A productive pollinator garden does not need to be enormous, complicated, or filled with dozens of specialized plants.
Start with the conditions you already have. Choose plants that fit your climate, sunlight, soil, and moisture. Build in overlapping bloom periods, include locally appropriate native plants where they make sense, and remember that flowers are only part of the habitat.
Water new plants while they establish. Reduce unnecessary pesticide exposure. Leave selected nesting and overwintering habitat where practical. Then observe what succeeds and adjust the planting as it matures.
The strongest garden will not be the one with the longest plant list. It will be the one where the plants thrive, useful resources remain available through the seasons, and maintenance is realistic enough to continue year after year.

