
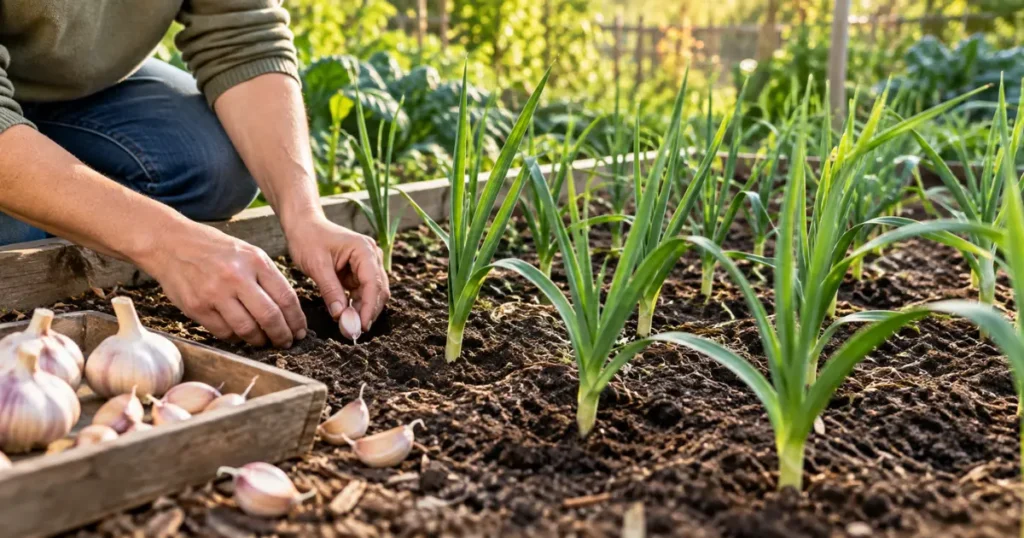
Growing your own garlic is mostly a matter of getting a few important decisions right at the beginning: choose planting stock suited to your climate, give it a sunny site with well-drained soil, plant individual cloves at the appropriate time, and keep the crop growing steadily until the bulbs mature.
If you are learning how to grow garlic for the first time, the long growing season can make the crop seem more complicated than it really is. In much of the United States, gardeners plant cloves in fall, allow them to establish roots before winter, then watch vigorous leafy growth resume in spring before bulbs enlarge toward summer.
This guide takes you through that entire process, including choosing hardneck or softneck garlic, preparing the soil, planting garlic cloves, watering and fertilizing appropriately, growing garlic in raised beds, recognizing normal growth stages, harvesting at the right stage, and curing the bulbs for storage.
If you’re planning your first garden, our guide to how to start a garden explains the broader basics of selecting a site and preparing a growing area.
Quick Summary
- Start with healthy planting stock: Garlic is normally grown from individual cloves taken from bulbs sold for planting rather than from true seed.
- Choose a type suited to your climate: Hardneck garlic is generally better adapted to colder regions, while many softneck types are well suited to milder climates and tend to store longer.
- Use a sunny, well-drained site: Garlic grows best with strong light and soil that holds useful moisture without remaining waterlogged.
- Planting depth and spacing vary: Extension recommendations differ by region, so use local guidance where available rather than treating one measurement as universal.
- Plant individual cloves point up: Keep the basal, root-forming end downward and avoid damaging the clove when separating the bulb.
- Water according to conditions: Maintain adequate moisture during active growth, but reduce irrigation as bulbs mature rather than following a rigid schedule.
- Feed according to actual soil needs: Garlic uses nitrogen, but soil testing and existing fertility should guide fertilizer decisions.
- Harvest before bulbs split: Leaf dieback provides a useful maturity clue, then lift bulbs carefully and cure them in a shaded, dry, well-ventilated place if they are intended for storage.
Table of Contents
ToggleChoosing Garlic to Plant
When learning how to grow garlic, one of the first things to understand is that most home garlic is grown from cloves rather than botanical seed.
You buy a mature garlic bulb intended for planting, separate it into individual cloves, and plant those cloves.
Each healthy clove has the potential to produce a new bulb.
For the most reliable results, buy planting stock from a reputable local grower, garden center, seed company, or garlic supplier. The University of Minnesota Extension guide to growing garlic recommends healthy cloves from garlic seed producers and notes that planting material can introduce diseases into the garden.
Choose bulbs that are:
- firm rather than soft;
- free from mold and obvious decay;
- not badly damaged or bruised;
- made up of healthy, well-formed cloves;
- suitable for your local growing conditions.
Larger, healthy cloves are generally preferable planting pieces because they contain more stored reserves for the developing plant. You do not need to peel the clove down to the fleshy tissue before planting.
Hardneck vs Softneck Garlic
The two main groups most home gardeners encounter are hardneck and softneck garlic.
Hardneck garlic develops a stiff central stalk and normally produces a flower stalk called a scape. Hardneck cultivars commonly produce fewer, larger cloves arranged around the central stalk. They are often well adapted to colder climates.
Softneck garlic generally lacks the rigid central stalk of a hardneck bulb and usually produces more cloves. Once cured, its flexible stems make many softneck varieties suitable for braiding. Softnecks also tend to have good storage potential.
Penn State describes hardneck types as more cold-hardy than the softneck forms commonly used for braiding, while University of Minnesota Extension notes that local climate should influence cultivar selection. Penn State Extension
A practical way to choose is:
- Cold-winter climate: investigate locally adapted hardneck cultivars first.
- Milder-winter climate: softneck cultivars may be particularly suitable.
- Want garlic scapes: choose a hardneck.
- Long storage is especially important: compare locally suitable softneck cultivars.
- Unsure: ask a local Extension office or regional garlic grower which cultivars perform reliably in your area.
These are broad tendencies, not rules for every cultivar.
Can You Plant Grocery-Store Garlic?
A grocery-store clove can sometimes sprout and grow, but it is not the most dependable planting stock.
The bigger issue is not whether a clove is biologically capable of growing. It is whether that particular garlic is adapted to your climate and whether you know its health and production history.
University of Minnesota advises against relying on supermarket garlic for Minnesota gardens because the commonly sold types may not be adapted to local conditions. UMass Extension also notes that grocery-store bulbs may be poorly adapted to northeastern conditions and may sometimes have been treated to delay sprouting.
For a first garlic crop, reputable planting stock removes some unnecessary uncertainty.
Garlic Growing Conditions
Garlic performs best when it has enough light to build vigorous leaves and enough root-zone moisture to support bulb development without sitting in saturated soil.
Sunlight
Choose a location that receives full sun for most of the growing day.
Utah State University Extension recommends full sun for garlic, and other Extension guidance consistently places garlic in sunny garden sites. Utah State University Extension
Some temporary partial shade may not destroy a crop, but prolonged shade can reduce the energy available for strong growth and bulb development.
Remember that garlic occupies the bed for many months. A position that is sunny when you plant in fall may be shaded differently after nearby trees leaf out in spring.
Soil and Drainage
The ideal garlic soil is:
- well drained;
- reasonably moisture retentive;
- loose enough for bulbs to expand;
- fertile according to actual soil needs;
- free from prolonged waterlogging.
University of Minnesota Extension recommends well-drained, moisture-retentive soil and gives a preferred soil pH of about 6.0 to 7.0. Extension at Minnesota
Poor drainage deserves particular attention because the bulb develops underground. Constantly saturated conditions can contribute to root and bulb problems, especially when cool or wet weather is already slowing soil drying.
Very dense or stony soil can also interfere with bulb development and make harvesting more difficult.
Preparing Soil for Garlic
Good garlic soil does not mean automatically adding compost, lime, manure, and fertilizer to every bed.
Start by assessing what you already have.
If your garden soil is reasonably loose, drains well, and has been managed with organic matter over time, it may need relatively little preparation beyond clearing weeds and creating a workable planting bed.
If the soil is compacted, gently loosen it before planting. Remove large stones and perennial weeds that will interfere with bulbs or compete with the crop.
A soil test is especially valuable if you do not know the pH or fertility of the bed. University of Minnesota specifically recommends soil testing before making fertility decisions.
Compost can be useful where the soil is low in organic matter, but add it because the soil benefits from it, not because garlic automatically requires a fresh layer every year. For practical guidance on applying finished compost appropriately, see our guide to how to use compost in the garden.
Likewise, do not add lime merely because you have read that garlic prefers a certain pH. Lime changes soil chemistry and should be used when testing shows that adjustment is appropriate.
The goal is a well-structured, fertile, freely draining bed, not the maximum possible amount of amendment.
When to Plant Garlic
For much of the United States, garlic is planted in fall.
The objective is to plant early enough for cloves to begin rooting before deep winter, while avoiding excessively early planting that encourages a large amount of tender top growth before cold weather.
Exact timing varies considerably by region.
For example, University of Minnesota recommends planting about one or two weeks after the first killing frost, while Utah State gives a broad regional planting period from late September into November. Penn State recommends mid- to late October for Pennsylvania. Extension at Minnesota
Those recommendations illustrate why one national planting date would be misleading.
In cold climates, fall planting also exposes garlic to the cool conditions needed for normal bulb development. Milder regions have different planting windows and cultivar choices.
Use your local Cooperative Extension guidance and planting-stock supplier recommendations to refine timing for your area.
How to Prepare Garlic Cloves for Planting
Do not separate the bulb weeks before you intend to plant it.
Keeping cloves together in the intact bulb helps protect them during storage. University of Minnesota recommends separating individual cloves only a day or two before planting.
When planting time arrives:
- Gently break the bulb apart into individual cloves.
- Select firm, healthy cloves.
- Discard cloves showing mold, soft rot, serious discoloration, or substantial damage.
- Leave the clove’s papery covering intact as much as practical.
- Identify the pointed tip and the flatter basal end where roots emerge.
You do not need to soak garlic cloves in homemade solutions before planting as a routine requirement. Various treatments are sometimes used in specialized production or disease-management systems, but they are not a universal prerequisite for successfully growing garlic at home.
If you are growing more than one cultivar, label them before planting. Garlic rows can look frustratingly similar several months later.
How to Plant Garlic Cloves
Understanding how to plant garlic correctly is one of the most important parts of the whole crop.
If you are wondering how to grow garlic from a clove, the basic process is straightforward: plant each individual clove with the basal plate downward and the pointed end facing upward, then give it sufficient soil cover and room to develop a bulb.

Plant Each Clove in the Correct Direction
Place the pointed end upward.
The flatter, rougher basal plate should face downward because that is where the roots emerge.
A clove planted sideways may still correct its growth direction, but proper orientation gives the developing shoot and roots the most direct path.
Garlic Planting Depth
Planting-depth recommendations legitimately vary.
Penn State recommends approximately 1–2 inches deep for garlic in Pennsylvania. Utah State recommends 2–3 inches deep, while Minnesota guidance describes positioning the base of the clove about 2–3 inches below the soil surface. Penn State Extension
Differences in climate, winter conditions, soil, mulch, and how sources measure depth all contribute to these variations.
Rather than forcing one number on every US gardener:
- use locally appropriate Extension guidance;
- make sure the clove is fully covered;
- avoid leaving it almost exposed at the surface;
- avoid planting so deeply that emergence and harvest become unnecessarily difficult.
In colder areas, planting and mulch practices may provide greater winter protection than those used in milder climates.
Garlic Spacing
Spacing also varies among reputable sources.
Utah State recommends cloves roughly 3–4 inches apart, Penn State approximately 6–7 inches, and Minnesota commonly uses about 6 inches between cloves in its bed system. Utah State University Extension
For many home gardens, around 4–6 inches between standard garlic plants provides a useful working range, but cultivar size and local recommendations should take priority.
Closer spacing fits more plants into the bed but increases competition and may reduce individual bulb size. Wider spacing costs more garden area but gives each plant more room.
Leave enough space between rows to weed, inspect, and harvest the crop without trampling plants. You do not need wide farm-style row spacing in a small intensively managed bed.
Cover and Settle the Soil
After planting garlic cloves:
- Cover them with soil.
- Gently firm the surface so there are no large air pockets.
- Water if the soil is dry and conditions warrant it.
- Add winter mulch where that practice is appropriate for your climate.
Avoid compacting the bed heavily. The goal is good contact between soil and clove, not hard-packed ground.
Growing Garlic in Raised Beds
If you’re learning how to grow garlic in a raised bed, the same basic growing principles apply. Raised beds can be particularly useful where they improve drainage or make it easier to maintain loose planting soil.
Penn State includes raised-bed production in its garlic guidance, and North Dakota State notes that garlic works well in raised-bed systems.
The basic principles remain the same as in an in-ground bed: sun, appropriate planting depth, sensible spacing, adequate fertility, moisture, and good drainage.
A few raised-bed details deserve extra attention.
Provide a Useful Depth of Soil
The bed should contain enough workable soil to accommodate garlic roots and maintain a reasonably stable moisture supply.
Avoid extremely shallow beds that dry within hours in warm or windy weather. If the raised bed is open to the native soil beneath it, roots may extend beyond the added bed soil; a solid-bottom planter behaves more like a large container and requires more deliberate soil-depth and moisture management.
Do Not Overcrowd the Bed
Raised beds often encourage intensive spacing, but bulbs still need room.
Use the same mature spacing principles you would use in the ground rather than squeezing extra cloves between every available opening.
Watch Moisture More Closely
A well-drained raised bed may shed excess water effectively, which is useful for garlic.
The trade-off is that elevated soil can dry faster than surrounding ground in some climates and soil mixes. Check moisture rather than assuming a raised bed is either automatically wet or automatically dry.
That moisture monitoring becomes particularly important during active spring growth.
Watering Garlic
Garlic needs reliable moisture while leaves and bulbs are actively developing, but permanently soggy soil creates a different set of problems.
This is why a fixed instruction such as “water every three days” is not useful.
Actual irrigation frequency depends on:
- rainfall;
- soil texture;
- drainage;
- temperature;
- wind;
- mulch;
- raised bed versus in-ground growing;
- plant growth stage.
Utah State emphasizes maintaining adequate soil moisture because garlic has a relatively shallow root system, while Minnesota recommends thorough watering during the active growing season and reducing irrigation before harvest. Utah State University Extension
Check the soil below the surface. If the root zone is becoming dry during active growth and rain is insufficient, water deeply enough to moisten it.
If the soil is already wet, wait.
As bulbs approach maturity, irrigation normally decreases. Minnesota recommends stopping watering roughly two weeks before harvest, while Utah State similarly advises stopping as leaves begin to mature. The precise timing should respond to rainfall and local conditions rather than becoming an automatic calendar date. Extension at Minnesota
Too much late-season moisture can interfere with bulb drying and increase disease risk.
Fertilizing Garlic
Garlic has meaningful nutrient requirements, particularly for nitrogen during active vegetative growth, but that does not mean every garden needs the same fertilizer.
Begin with the soil.
If you’re comparing nutrient sources, our guide to organic fertilizer for plants explains the broader options and how to choose them according to plant and soil needs.
The University of Minnesota Extension garlic guidance recommends testing soil and adjusting nutrients according to test results. It also notes that garlic has moderate to high nitrogen demand but warns against unnecessary phosphorus applications where soil levels are already high.
For home gardeners, that leads to a sensible sequence:
- Assess the existing soil.
- Use a soil test when fertility is unknown or problems have occurred.
- Account for compost, manure, or fertilizer already applied.
- Supply nutrients that are actually needed.
- Follow the fertilizer label and locally appropriate recommendations.
Nitrogen is most useful while the plant is building leaves in spring. Heavy late nitrogen can delay normal bulb development and maturity.
Do not treat pale foliage as proof of nitrogen deficiency without looking at the whole plant. Excess or inadequate moisture, cold injury, disease, and root problems can also cause yellowing. Minnesota Extension’s garlic diagnostic guidance lists multiple possible causes of yellow foliage rather than treating it as a single-condition symptom. Extension Apps
Mulching and Seasonal Garlic Care
Mulch can serve several useful purposes around garlic.
In colder climates, a layer of clean straw or leaves can buffer soil against repeated freezing and thawing. Mulch can also suppress weeds and slow moisture loss.
Minnesota recommends a winter layer of leaf or straw mulch, while Penn State also notes the value of straw for winter protection, moisture conservation, and weed suppression.
How you manage that mulch in spring depends on climate.
In a cold region, temporarily pulling back heavy mulch can allow the soil to warm faster. In a dry site, retaining a sensible layer may help conserve moisture and suppress emerging weeds.
Keep checking the plants rather than treating mulch as a set-and-forget treatment.
Garlic also competes poorly with weeds, particularly when young. Pull or cultivate weeds carefully so you do not injure shallow roots or developing bulbs.
What About Garlic Scapes?
Hardneck garlic usually sends up a scape in late spring or early summer.
The scape starts relatively straight, then often curls as it develops.
Removing young scapes is a normal part of hardneck garlic care and can help direct more plant resources toward the bulb. Penn State recommends removing scapes while they are young to improve bulb size.
Scapes are edible, so they do not need to become garden waste.
Softneck garlic typically does not produce the same prominent scape, although cultivar and growing conditions can affect flowering behavior.
Garlic Growth Stages
Understanding garlic growth stages is an important part of learning how to grow garlic successfully. Long periods can pass when little seems to be happening above the soil, even though the crop is developing underground.
1. Root Establishment
After planting, the clove begins producing roots.
With fall-planted garlic, much of this early development can occur before winter. Depending on climate and planting time, shoots may or may not emerge above ground before cold weather.
2. Winter Slowdown or Dormancy
In cold climates, above-ground growth slows considerably through winter.
Do not assume that an empty-looking bed means the cloves have failed. The crop is adapted to resume active growth as conditions improve.
3. Spring Leaf Growth
As temperatures rise, garlic produces vigorous green leaves.
These leaves matter because they capture the energy that eventually supports bulb development. Keep the crop reasonably free of weeds and adequately supplied with moisture and nutrients during this stage.
4. Scape Development in Hardneck Garlic
Hardneck types produce scapes as plants approach the bulbing stage.
This is a useful seasonal marker as well as a harvest in its own right.
5. Bulb Enlargement
As day length and seasonal conditions change, the underground bulb expands and separates into recognizable cloves.
This is not the stage to start pushing heavy new leafy growth with excessive late nitrogen.
6. Maturation
Lower leaves begin yellowing and drying as the crop approaches harvest.
Irrigation is reduced, bulbs complete development, and the protective wrappers begin moving toward the dry condition needed for harvest and storage.
Common Garlic Growing Problems
A yellow leaf, small bulb, or weak plant does not identify a problem by itself.
Garlic symptoms can result from weather, soil conditions, water, nutrient problems, insects, disease, or planting stock.
The best rule is:
Observe and identify before treating.
Poor Growth or Small Bulbs
Possible contributors include:
- excessive shade;
- overcrowding;
- weed competition;
- inadequate water during active growth;
- poor soil fertility;
- unsuitable planting stock;
- planting too late for adequate establishment;
- disease or root damage.
Avoid jumping directly to fertilizer. First check light, moisture, spacing, root-zone conditions, and the overall pattern across the bed.
Yellow Leaf Tips
Some yellowing is normal as harvest approaches.
Earlier in the season, however, yellow tips can have multiple causes. Minnesota Extension notes possibilities including cold injury, too much or too little moisture, nitrogen deficiency, and several plant-health problems. Fruit and Vegetable IPM
Context matters.
A uniformly pale crop after heavy spring rain suggests a different investigation from one isolated plant that is wilting beside otherwise healthy neighbors.
If garlic leaves begin yellowing before the crop approaches maturity, our guide to yellow leaves on plants explains how to examine yellowing patterns, check watering and drainage, and investigate nutrient problems and other possible causes before taking corrective action.
Bulb and Root Rot
Chronically wet, poorly drained soil increases the risk of several bulb and root problems.
Garlic showing soft bulbs, unusual discoloration, mold, or rapidly declining foliage deserves closer inspection rather than another round of watering.
Do not eat, store, or save badly diseased bulbs as planting stock.
Insects and Other Pests
Garlic is not pest-free.
University of Minnesota lists onion maggot and bulb mites among potential problems and also notes that diseases and pests can arrive in planting material.
For recurring serious problems, identify the pest before choosing a control. Your local Cooperative Extension office or diagnostic laboratory can often help with samples or photographs.
Reduce Problems Before They Start
Useful preventive steps include:
- planting firm, healthy cloves;
- providing good drainage;
- avoiding unnecessary injury to bulbs;
- controlling weeds;
- maintaining sensible spacing;
- rotating garlic and other onion-family crops where practical.
University of Minnesota’s general home-garden disease guidance recommends rotating plant families for roughly two to four years where space allows.
How to Know When Garlic Is Ready to Harvest
Garlic is not ready simply because it has formed a visible bulb.
Harvest too early and bulbs may be undersized with poorly developed cloves. Wait too long and outer wrappers can deteriorate while cloves begin separating from the bulb.
Leaf condition provides a useful clue.
University of Minnesota recommends beginning harvest when lower leaves have browned but approximately half or slightly more than half of the upper leaves are still green. Penn State similarly advises harvesting when leaves are browning while several leaves remain at least partly green.
Do not depend on leaf color alone.
When maturity appears close, carefully lift one or two sample bulbs.
Look for:
- a well-filled bulb;
- clearly defined cloves;
- protective wrappers still intact;
- no widespread splitting or separation.
Different cultivars and climates mature at different times, so inspecting a sample bulb is more reliable than harvesting solely because a calendar says July.
How to Harvest Garlic
Garlic bulbs are easier to damage than they look when freshly harvested.
Do not simply grab the leaves and yank hard.

Instead:
- Insert a garden fork or spade far enough away from the bulb that you are unlikely to slice it.
- Loosen the soil beneath and around the plant.
- Lift the bulb gently.
- Shake or brush away only loose clumps of soil.
- Handle the bulb carefully to avoid bruising.
Penn State specifically recommends lifting garlic with a spade or shovel rather than pulling it by the stem because fresh bulbs bruise easily.
Set aside damaged bulbs for earlier kitchen use rather than expecting them to store as well as intact bulbs.
Avoid leaving harvested garlic baking in intense direct sun for extended periods.
If you intend to store the crop, move it toward the curing stage promptly.
Curing and Storing Garlic: A Basic Overview
Freshly harvested garlic can be eaten without curing.
Curing is primarily useful when you want bulbs to dry sufficiently for storage.
Arrange harvested garlic in a dry, shaded, well-ventilated location. Good airflow around the bulbs and foliage helps moisture escape.
University of Minnesota suggests a warm, dry, airy location for approximately three to four weeks, while University of Maine likewise recommends curing in a warm, dry place with good air movement and avoiding extremely hot spaces or direct sunlight.
The exact curing period varies with:
- humidity;
- temperature;
- airflow;
- bulb size;
- whether foliage is left attached;
- harvest conditions.
Garlic is sufficiently cured when the outer wrappers and neck are dry rather than moist and fleshy.
After curing:
- brush away loose dry soil gently;
- trim roots carefully;
- trim hardneck stems if desired;
- retain softneck stems if you plan to braid them;
- discard bulbs showing serious rot or disease;
- keep the best healthy bulbs separate if you intend to save planting stock.
Store cured bulbs somewhere dry, ventilated, and protected from direct sunlight.
Long-term storage requirements and storage life vary between garlic types and environmental conditions, so this guide stops at the practical post-harvest basics rather than treating storage as one universal formula.
How Long Does Garlic Take to Grow?
Garlic is a long-season crop.
Fall-planted garlic commonly remains in the ground from autumn until the following summer, but there is no single universal number of days that applies to every gardener.
Total growing time depends on:
- planting date;
- hardneck or softneck type;
- cultivar;
- winter climate;
- spring temperatures;
- day length;
- soil and moisture conditions.
A clove planted in fall may spend months establishing roots, experiencing winter conditions, producing spring foliage, enlarging its bulb, and finally maturing for summer harvest.
The more useful approach is to follow the plant’s stages and maturity signs rather than counting a fixed number of days.
Frequently Asked Questions About Growing Garlic
These common questions address practical details beginners often encounter when learning how to grow garlic at home.
Can You Grow Garlic From a Clove?
Yes. Growing garlic from cloves is the normal method for home gardeners.
Separate a healthy bulb into individual cloves shortly before planting, keep each clove’s protective covering intact where possible, and plant with the pointed end upward and basal end downward.
Can Grocery-Store Garlic Be Planted?
It can sometimes grow, but planting stock from a reputable supplier is generally a better choice.
Grocery-store garlic may be a cultivar poorly adapted to your climate, and you may know little about its health or previous treatment. Locally suitable planting garlic reduces those uncertainties.
Does Garlic Need Full Sun?
Garlic performs best in full sun.
A bright site supports strong leaf growth and bulb development. Avoid planting it where buildings, trees, or taller crops will create substantial shade through the main spring growing period.
How Deep Should Garlic Cloves Be Planted?
There is no single measurement used by every authoritative source.
Extension recommendations include roughly 1–2 inches in some regions and 2–3 inches or more in others, depending partly on climate and how planting depth is measured. Follow locally appropriate advice rather than assuming one number is correct nationwide.
How Far Apart Should Garlic Be Planted?
Recommendations vary from roughly 3–4 inches to 6 inches or more between plants.
Around 4–6 inches is a useful general home-garden range for many standard garlics, but cultivar, desired bulb size, soil fertility, and local guidance should influence the final spacing.
Can Garlic Grow in Raised Beds?
Yes.
Raised beds can work very well for garlic when they provide good drainage, sufficient usable soil, appropriate spacing, and consistent moisture.
Because raised beds can dry faster than surrounding ground, check actual soil moisture during active growth.
How Often Should Garlic Be Watered?
There is no reliable universal schedule.
Water when soil moisture, weather, rainfall, and the crop’s growth stage indicate a need. Garlic requires adequate moisture during active growth but should not remain waterlogged, and watering is normally reduced as bulbs mature.
How Do You Know When Garlic Is Ready to Harvest?
Begin checking when lower foliage has browned while several upper leaves remain green.
Lift a sample bulb and confirm that it has filled out into clearly defined cloves with useful outer wrappers still intact. Do not wait until every leaf is completely dead, because overmature bulbs can begin splitting apart.
Conclusion
Learning how to grow garlic becomes much simpler once you view it as a sequence rather than a single planting task.
Start with healthy garlic suited to your climate. Choose a sunny location with well-drained soil, assess fertility before adding amendments, and plant individual cloves at a depth and spacing appropriate for your region.
During active growth, keep weeds under control and monitor moisture instead of watering by habit. Feed according to actual soil needs, manage mulch for your climate, and remove hardneck scapes when appropriate.
As summer approaches, watch the foliage and inspect sample bulbs rather than relying only on a date. Lift mature bulbs carefully, then cure those intended for storage in a dry, shaded place with good airflow.
From one healthy clove, you can produce an entire bulb ready for cooking, storage, or planting again—and once you understand the crop’s seasonal rhythm, the process is surprisingly manageable.