
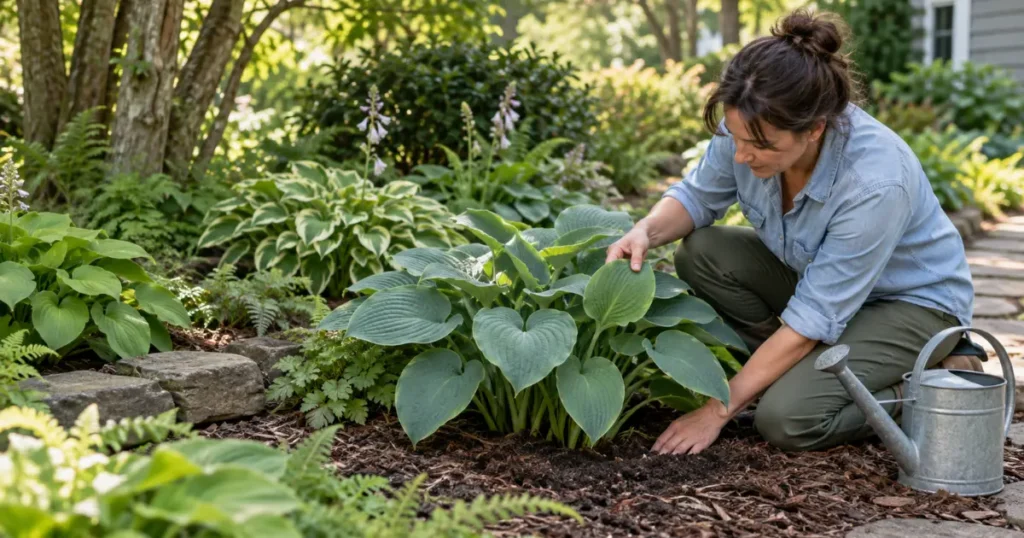
Hosta care with a gardener checking soil moisture beside healthy hostas in a shaded garden

Hosta Care: How to Grow Healthy Hostas Year After Year

Good hosta care starts with getting a few fundamentals right: suitable light, moisture-retentive but well-drained soil, reliable water during dry periods, and enough room for the plant to reach its mature size.

Hostas are often treated as plants for difficult shady corners, but they are not all identical. Some cultivars tolerate more sun than others, leaf color can affect how much light is appropriate, and even a shady planting can become surprisingly dry when hostas compete with tree roots for moisture.

Once established in a suitable site, hostas can be relatively manageable, long-lived perennials. This guide covers where to grow them, planting, soil, watering, feeding, mulching, routine maintenance, deadheading, cutting back, seasonal dormancy, and when division may be useful—without turning ordinary care into an unnecessarily complicated routine.

Quick Summary

  • Light: Most hostas perform best in partial to full shade, but sun tolerance varies among cultivars.
  • Soil: Aim for fertile, moisture-retentive soil that still drains well rather than soil that remains saturated.
  • Water: Keep newly planted hostas from drying excessively; established plants still benefit from moisture during dry periods.
  • Feeding: Hostas do not require heavy fertilization when soil fertility and organic matter are already adequate.
  • Mulch: A modest organic mulch can conserve moisture and suppress weeds, but keep it away from the crown.
  • Maintenance: Remove damaged leaves when useful and spent flower stalks if you prefer a tidier appearance.
  • Cutting back: Do not remove healthy foliage simply because flowering has finished; wait for natural decline later in the season.
  • Winter: Hostas are dormant perennials. In climates where they are hardy, the foliage dies back and new shoots emerge again in spring.

Hosta Care at a Glance

Hostas are primarily foliage perennials, valued for leaves that range from deep green and blue-green to gold, chartreuse, and variegated combinations. Their requirements are fairly consistent at a broad level, but cultivar differences matter.

Most grow best with some protection from harsh afternoon sun. Iowa State University Extension describes hostas as performing best in full to partial shade, while noting that leaf color affects sun tolerance: blue-leaved forms generally need more shade, while many green and gold selections tolerate somewhat more light when moisture is adequate.

They prefer soil that stays reasonably moist but drains well. Rich organic matter can help soil retain useful moisture without becoming stagnant.

Routine maintenance is usually modest. Keep them watered when conditions become dry, maintain sensible mulch, feed only when needed, and allow healthy foliage to remain through the growing season.

Hostas are herbaceous perennials, so the visible leaves naturally decline as the plant enters dormancy. The crown and root system remain below ground through winter in climates where the cultivar is hardy, as explained in Iowa State University Extension’s guidance on growing hostas.

Where Do Hostas Grow Best?

The best hosta location combines suitable light with dependable moisture and drainage.

The classic hosta site is not necessarily deep darkness beneath a dense tree canopy. Some hostas struggle in extremely heavy shade, while others suffer leaf scorching when exposed to intense afternoon sun.

How Much Sun or Shade Do Hostas Need?

Most hostas are best treated as shade to partial-shade plants, but the word “shade” needs some nuance.

Several hours of gentler morning sun followed by afternoon shade can work very well. Dappled light beneath an open tree canopy can also be suitable.

Leaf color is one clue to tolerance. Iowa State notes that blue-leaved hostas generally need heavier shade to preserve their characteristic blue appearance, while many yellow and gold cultivars develop stronger coloration with some sun. Heavily variegated selections may be more vulnerable to scorching in strong exposure.

That does not mean every gold hosta belongs in full sun or every blue hosta belongs in dense shade. Cultivar, summer temperature, humidity, soil moisture, latitude, and the intensity of the exposure all influence results.

Harsh afternoon sun combined with dry soil is particularly difficult. Brown or scorched leaf margins can develop when hostas are placed in hot, dry exposures.

If you are uncertain, a site with morning light and protection during the hottest part of the day is usually a safer starting point than an exposed west-facing position.

Choosing the Right Location

Light is only the first consideration.

Look for a location where the root zone can remain reasonably moist without staying waterlogged. A low area with chronically saturated soil is not automatically a good hosta site simply because hostas appreciate moisture.

Also consider competition.

Hostas beneath mature trees may receive excellent shade but still struggle for water because tree roots draw moisture from the same soil. Iowa State specifically notes that shaded gardens beneath trees can dry faster because of root competition.

Give the plant adequate room as well. Hostas vary enormously in mature size—from miniature cultivars to broad clumps occupying substantial space—so check the expected width of the cultivar rather than spacing every plant identically.

A good site therefore balances:

appropriate shade + available moisture + good drainage + manageable competition + enough mature space

What Kind of Soil Do Hostas Need?

Hostas perform best in soil that combines moisture retention with drainage.

Those requirements are not contradictory. Good hosta soil holds enough moisture to prevent the root zone from drying rapidly but still contains enough pore space for excess water to move away and air to reach the roots.

Illinois Extension describes hostas as preferring moist, well-drained soil with good organic matter content.

A fertile loam enriched with organic matter is often ideal. Very sandy soil may dry too quickly unless amended and managed carefully, while dense compacted clay can remain excessively wet.

Hostas generally tolerate the mildly acidic to near-neutral conditions found in many cultivated garden soils. There is little value in trying to force the pH toward one exact number unless a soil test identifies an actual problem.

Improving the Soil Before Planting

Improve the whole root area rather than creating a tiny pocket of radically different soil around the plant.

Compost, leaf mold, or another well-decomposed organic amendment can improve structure and water-holding capacity in appropriate soils.  If you plan to amend the bed with compost, our guide on how to use compost in the garden explains practical ways to apply it without assuming that more is always better.Missouri Extension specifically recommends organic matter as part of soil preparation for hostas and emphasizes good drainage.

Avoid assuming that more amendment is always better.

A heavily amended planting hole surrounded by dense native soil can behave differently from the surrounding ground. The goal is a hospitable root zone into which the hosta can expand—not an isolated container-like pocket.

If you are dealing with extremely compacted soil, persistent standing water, or another significant drainage problem, address that site issue before planting rather than expecting a hosta to tolerate poor root conditions.

Should You Mulch Hostas?

Usually, a modest layer of organic mulch is useful.

Mulch can:

  • slow moisture loss;
  • reduce weed competition;
  • moderate soil temperature;
  • gradually contribute organic matter as it decomposes.

Iowa State recommends organic materials such as shredded bark, leaf mold, or shredded leaves to help conserve soil moisture.

A layer of roughly 2–3 inches is commonly sufficient for established beds. More is not automatically better.

Keep mulch from being packed against the hosta crown. Illinois Extension advises leaving space between mulch and perennial crowns because excessive material directly against the plant base can contribute to crown problems.

How to Plant Hostas

Planting does not need to be complicated, but the crown should end up at an appropriate level and the roots need good contact with the surrounding soil.

When Is the Best Time to Plant Hostas?

Spring and early fall are commonly useful planting periods for hardy perennials, including hostas, because conditions are often less stressful than midsummer heat.

The best window still depends on your climate.

Spring planting gives the roots a full growing season to establish before winter. Early fall can also work where enough growing time remains before the ground freezes, but late-planted hostas in cold climates may benefit from winter mulch to reduce frost heaving. Iowa State specifically recommends winter protection for hostas planted in late summer or early fall where repeated freezing and thawing is a concern.

Summer planting is possible when necessary, but additional attention to watering is usually required.

Avoid planting into frozen soil, saturated soil, or during extreme heat when you can reasonably wait for better conditions.

How to Plant a Hosta

Start by watering the nursery plant if its root ball is dry.

Dig a planting area broad enough to accommodate the roots without forcing them into a tight vertical hole. Loosen compacted soil around the planting area where practical.

Remove the hosta from its container and gently free roots that are circling tightly.

Set the plant so the crown sits at approximately the same growing level it occupied in the nursery container. Missouri Extension recommends covering container-grown hosta roots to the same level at which they were previously growing.

Backfill with soil, firm it gently enough to remove large air pockets, and water thoroughly.

Do not bury the crown deeply beneath extra soil or mulch. If you are creating a garden bed for the first time, our guide on how to start a garden covers site selection, soil preparation, plant choice, and the basic planting process.

How Far Apart Should You Plant Hostas?

Spacing depends on mature cultivar size.

That point matters because hostas range from tiny miniature selections to very large clumps. Illinois Extension lists spacing that can vary from about 12 inches to several feet depending on the variety.

Use the mature width on a reliable cultivar label or horticultural reference rather than applying one distance to every hosta.

If you want the bed to look full quickly, it can be tempting to crowd young plants. But planting too tightly can create competition and make later maintenance more difficult.

Allow space for the mature plant, not just the size of the nursery pot.

How Often Should You Water Hostas?

Hostas appreciate dependable moisture, but there is no reliable rule such as “water every Tuesday” or “water exactly twice a week.”

How often they need irrigation depends on:

  • rainfall;
  • soil texture;
  • drainage;
  • temperature;
  • wind;
  • sun exposure;
  • tree-root competition;
  • mulch;
  • whether the plant is newly planted or established.

Iowa State recommends irrigating when soil conditions become dry and notes that hostas perform best when they are not allowed to become excessively dry.

The practical goal is evenly moist, well-drained soil, not permanently wet soil.

Check the root zone rather than judging only from the calendar.
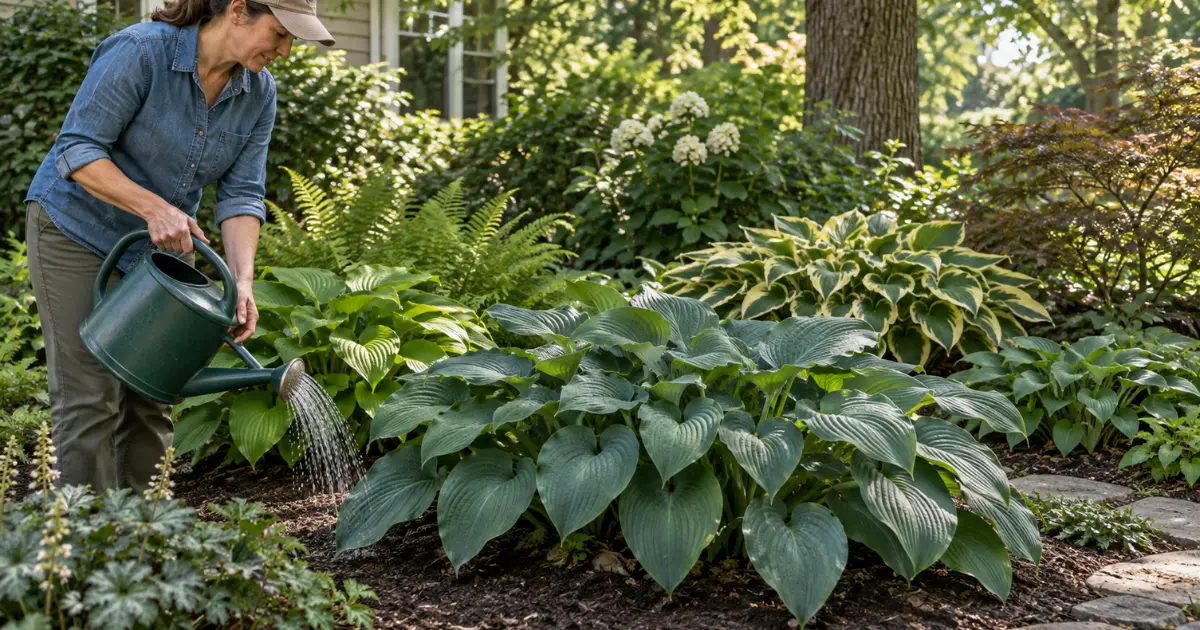
Gardener watering healthy hostas growing in filtered shade with moist well-drained soil

Watering Newly Planted Hostas

A newly planted hosta deserves closer attention.

Its roots are still concentrated largely within the original nursery root ball, so it cannot yet draw moisture from the same volume of soil as an established clump.

Water thoroughly after planting. Then monitor moisture around the actual root ball during establishment.

Illinois Extension’s general perennial-care guidance recommends soaking newly planted perennials after planting and checking them regularly so they do not dry out while becoming established.

Do not translate that into automatic daily watering.

Cool, cloudy weather in moisture-retentive soil may require relatively little intervention, while warm weather, a dry site, or competing tree roots can increase moisture loss substantially.

Check first, then water according to the conditions you find.

Watering Established Hostas

Established hostas usually have a broader root system and are more resilient than fresh transplants.

They still grow and look best when prolonged drought is avoided.

Water deeply enough to moisten the root zone rather than repeatedly wetting only the top fraction of the soil. Then allow normal drainage.

A mulched hosta in moisture-retentive loam may need irrigation less frequently than the same cultivar growing in sandy soil beneath thirsty tree roots.

Rainfall also needs interpretation. A brief shower may wet only the surface, while prolonged rain may supply the entire root zone.

The decision should always return to the soil itself.

Signs Hostas May Need More Water

Hostas experiencing excessive dryness may show:

  • drooping or wilting foliage;
  • browning or scorching along leaf margins;
  • reduced vigor;
  • foliage that looks increasingly stressed during hot, dry periods.

Brown leaf margins are particularly associated with dry conditions and excessive sun exposure in Extension guidance.

However, a symptom is not a diagnosis.

Wilting or yellowing can also occur with root problems, disease, heat stress, or excessively wet soil. Check actual root-zone moisture before deciding that the plant simply needs more water.

Persistently saturated soil is not the solution to drought stress. Roots also need air, which is why drainage remains essential.

How and When to Fertilize Hostas

Hostas do not need heavy feeding simply because they produce large leaves.

Good soil structure, organic matter, moisture, and appropriate light usually matter more than pushing growth with repeated fertilizer applications.

Iowa State notes that many soils already provide adequate fertility for hostas, particularly where organic matter is regularly returned to the bed. Where additional fertilizer is warranted, it recommends a general-purpose fertilizer in spring as leaves emerge, used according to the product label.

That conservative approach is appropriate for most home gardens.

Do not assume that pale or poor-looking foliage automatically means the plant needs fertilizer. Light exposure, moisture stress, cultivar color, root problems, and disease can all affect appearance.

If plants consistently perform poorly despite suitable light and moisture, a soil test is more informative than randomly increasing fertilizer, according to Iowa State University Extension’s current hosta care recommendations.

Do Hostas Need Fertilizer Every Year?

Not necessarily.

A hosta growing vigorously in fertile soil with regular additions of compost or decomposing organic mulch may need little or no supplemental fertilizer.

If fertility is genuinely low, a spring application of an appropriate general-purpose fertilizer can be useful. If supplemental feeding is needed, our guide to organic fertilizer for plants explains the main fertilizer options and how to use them responsibly.

Follow label rates. More fertilizer does not automatically create a better hosta, and excessive applications can waste nutrients or produce overly soft growth.

Avoid making fertilizer the first response to every problem.

How to Care for Hostas During the Growing Season

Once hostas are established, summer maintenance is mainly about protecting the foliage and keeping the root zone reasonably comfortable.

Continue monitoring moisture, especially during prolonged dry weather or when plants grow beneath trees.

Keep weeds from competing around young plants. Maintain mulch at a sensible depth without piling it over the crown.

Inspect the foliage occasionally. A torn or browned leaf here and there is mostly a cosmetic issue; extensive or unusual damage may deserve closer investigation, but detailed pest and disease diagnosis belongs beyond routine care.

Hosta flowers also appear during the growing season on stalks, known as scapes, that rise above the leaves.

Should You Deadhead Hostas?

Deadheading is optional.
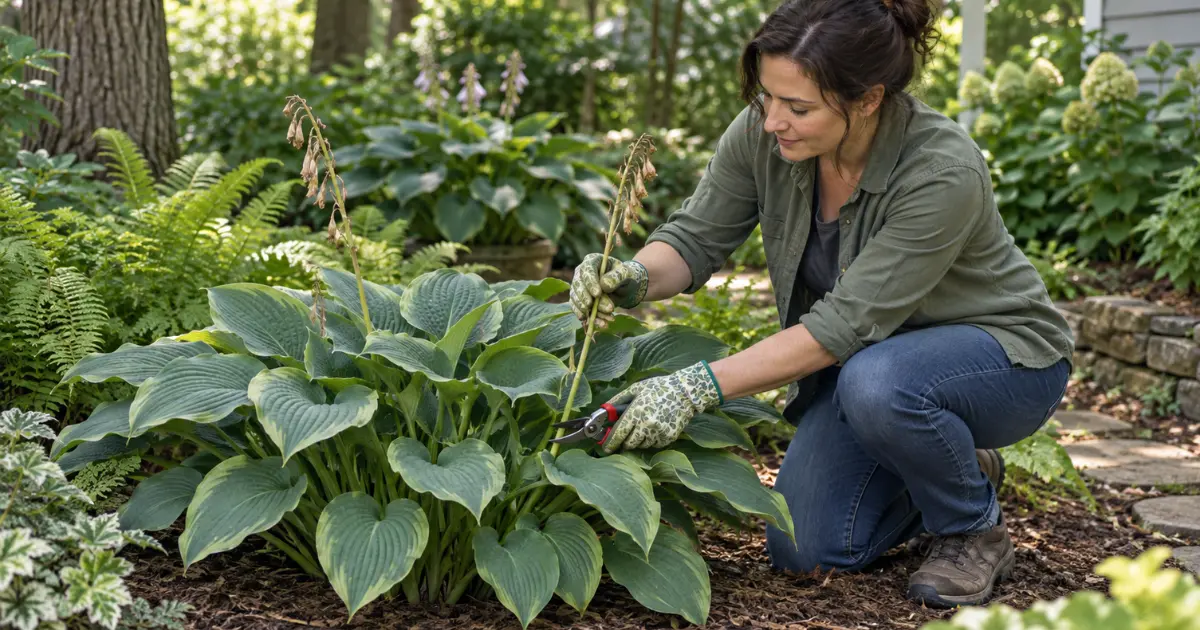
Gardener removing a spent hosta flower stalk while leaving healthy foliage intact

If you like the flowers—and pollinators may visit them—there is no need to remove them while they are attractive.

Once flowering finishes, you can cut spent stalks down near their base if you prefer a cleaner appearance and do not want seed formation. Iowa State notes that spent hosta flowers can be removed for appearance and to prevent seed production without harming the plant.

Deadheading the flower stalk is not the same thing as cutting back the leaves.

After flowering, healthy leaves are still photosynthesizing and supporting the crown and roots. Keep them unless they are genuinely damaged or naturally declining.

What Should You Do With Damaged or Yellowing Leaves?

An isolated damaged leaf can be removed if it looks unsightly or has become badly torn.

Use clean pruners or scissors and cut the leaf stalk near its base without damaging neighboring growth.

Do not automatically remove every leaf that develops a small cosmetic blemish.

White markings also deserve a closer look. Some hostas naturally have white or cream-colored variegation, while newly appearing white specks, powdery patches, or cottony material may need investigation. Our guide to white spots on leaves explains how to distinguish possible causes before deciding whether treatment is necessary.

Yellowing deserves context. A few aging leaves may decline naturally during the growing season, and the entire plant will eventually yellow and collapse as dormancy approaches.

Yellowing accompanied by unusual spotting, soft crown tissue, sudden collapse, or widespread unexplained decline can indicate something beyond routine aging. At that point, identify the cause before treating it as a simple maintenance issue. Penn State and Iowa State both document several hosta diseases that can produce browning, yellowing, or collapse.

If your hosta’s foliage is turning yellow unexpectedly, our guide to yellow leaves on plants explains how to distinguish natural leaf aging from possible watering, drainage, light, nutrient, and other growing problems before choosing a solution.

When and How to Cut Back Hostas

Hostas do eventually need seasonal cleanup, but timing matters.

Their leaves are not disposable simply because the flowers have faded.

Should You Cut Back Hostas After Flowering?

Do not remove healthy foliage immediately after bloom.

You can remove the spent flower stalks, but leave green functional leaves in place.

Those leaves continue producing carbohydrates that support the crown and root system. Removing them early reduces the plant’s functioning leaf area for no useful reason.

If one leaf is damaged, you can remove that leaf individually. Otherwise, let the foliage continue naturally until seasonal decline.

When Should You Cut Hostas Back for Winter?

Wait until the foliage has naturally yellowed, browned, collapsed, or been damaged by frost.

There is no single calendar date because fall weather differs dramatically across regions.

Once the foliage has finished functioning, it can be cut near ground level and removed from the bed. Illinois Extension recommends cutting back hosta foliage once fall color has subsided.

Use clean tools and avoid damaging the crown at soil level.

If foliage appears diseased, removing and disposing of affected material rather than leaving it around the crown can help reduce carryover of some problems.

Hosta Care in Fall and Winter

Hostas have a natural seasonal cycle.

As days shorten and temperatures fall, foliage deteriorates and the plant enters dormancy. This is normal, not a sign that the hosta has suddenly died.

What to Do With Hostas in Fall

Continue providing reasonable moisture if autumn is unusually dry and the ground is not frozen, particularly for newly planted hostas.

Allow the foliage to decline naturally rather than removing healthy green leaves simply because fall has arrived.

Once foliage yellows and collapses, clean it up if you prefer a tidy bed or if pest and disease sanitation is a concern.

Inspect the mulch as well. Maintain a reasonable layer over the soil, but avoid burying the crown under a heavy mound.

Late-planted hostas in cold climates can benefit from additional winter protection after the ground has frozen. Iowa State recommends winter mulch particularly for hostas planted in late summer or early fall because repeated freezing and thawing can heave insufficiently established plants from the soil.

Established hostas generally do not need elaborate winter protection under ordinary conditions where they are appropriately hardy, according to Iowa State University Extension’s winter protection guidance for hostas.

What Happens to Hostas in Winter?

The visible plant disappears, but the perennial is not necessarily dead.

Hostas overwinter through their crown and root system. Above-ground foliage dies back, and the plant remains dormant until appropriate spring conditions trigger new shoots.

This behavior sometimes worries first-time hosta growers who see an empty patch where lush summer foliage once stood.

Marking the location can be helpful if you tend to dig or rearrange beds before shoots emerge.

In spring, pointed new shoots—often called “eyes,” “points,” or “noses”—push up from the crown and begin another growing cycle. Iowa State describes these emerging points as a useful stage for division as well.

Do Hostas Need to Be Divided?

Not on a rigid schedule.

A healthy hosta can remain undisturbed for many years when it has adequate space and suitable growing conditions.

Gardeners usually divide hostas because they want additional plants, need to reduce the size of a clump, want to relocate part of it, or are dealing with an older clump whose center has begun to decline.

Spring, as new shoots begin emerging, is a particularly convenient time because the growing points are easy to see and foliage has not yet fully expanded. Iowa State identifies spring as the preferred time, while also noting that division can be done from spring into late summer when conditions allow.

Division does temporarily disturb the root system, so newly separated plants require establishment care afterward.

There is no need to dig up an attractive, vigorous clump simply because a fixed number of years has passed. When division is actually needed, our step-by-step guide on how to divide hostas explains the best timing, how to separate the clump, how to replant each division, and how to care for it afterward.

Common Hosta Care Mistakes to Avoid

Assuming all hostas want deep shade.
Very heavy shade can limit performance, while different cultivars tolerate different amounts of sunlight. Match exposure to the cultivar and local climate.

Putting them in harsh sun without enough moisture.
Hot afternoon sun combined with drying soil commonly produces scorched or browned foliage.

Planting in poorly drained ground.
Hostas like moisture, but that does not mean roots should remain waterlogged.

Letting new plants dry severely.
Fresh transplants have limited root reach. Check the actual root zone until the plant establishes.

Watering automatically instead of checking the soil.
A fixed schedule ignores rainfall, temperature, soil texture, mulch, and competition from neighboring roots.

Using too much fertilizer.
Healthy hostas in fertile soil may need little supplemental feeding. Heavy fertilizer does not compensate for poor light, drainage, or watering.

Piling mulch against the crown.
Mulch should protect the surrounding soil, not bury the plant base.

Crowding plants according to nursery-pot size.
Some hostas mature into very broad clumps. Plan according to expected mature spread.

Removing green leaves after flowering.
Flowering is not the end of the plant’s growing season. Deadhead stalks if desired, but retain healthy foliage.

Mistaking dormancy for plant death.
Complete foliage loss in fall and winter is normal for this herbaceous perennial.

Frequently Asked Questions About Hosta Care

Are Hostas Easy to Care For?

Generally, yes, when the site suits them.

Good light, reliable moisture, well-drained soil, and sensible seasonal maintenance are more important than complicated routines. Iowa State describes hostas as durable shade perennials with relatively few serious problems when grown appropriately.

Most prefer partial to full shade, but cultivar differences matter.

Many perform well with morning sun and afternoon shade. Blue forms usually benefit from more shade, while some green and gold selections tolerate more light when moisture is adequate.

Water according to soil moisture rather than a fixed number of days.

Newly planted hostas need closer monitoring. Established hostas still benefit from irrigation during dry periods, especially in sandy soil, hotter exposures, or beneath competing tree roots.

Not always.

Many garden soils provide enough fertility, particularly when beds contain good organic matter. If supplemental nutrients are needed, a conservative spring application according to the fertilizer label is usually more sensible than heavy repeated feeding.

You can, but it is optional.

Remove spent flower stalks near the base if you prefer a tidier plant or want to limit seed formation. Do not confuse that with cutting off healthy leaves.

Wait until foliage has naturally yellowed, browned, collapsed, or been finished by frost.

Do not remove healthy green foliage immediately after the flowers fade.

Yes, in climates where the cultivar is winter-hardy.

Hostas are perennial plants. Their leaves die back as they enter dormancy, while the crown and roots remain alive underground and produce new shoots the following spring.

Usually, yes.

Established hostas that are appropriate for the local climate normally overwinter in the ground. Recently planted hostas may benefit from protective winter mulch in regions where freezing and thawing can cause frost heaving.

Conclusion

Reliable hosta care is mostly about giving the plant conditions that support its natural growth cycle rather than constantly intervening.

Choose an appropriate balance of shade and light for the cultivar. Give the roots moisture-retentive but well-drained soil, water according to actual conditions, and use fertilizer conservatively rather than assuming more feeding means better foliage.

Mulch can help conserve moisture, but keep it away from the crown. Remove spent flower stalks if you want a tidier plant, while leaving healthy foliage intact until it naturally declines later in the season.

When winter arrives, remember that dormancy is normal. The leaves may disappear completely while the crown rests underground, ready to produce new growth when spring returns.

With a suitable site, steady moisture, sensible maintenance, and respect for that seasonal rhythm, hostas can remain attractive, dependable shade-garden perennials for many years.

Leave a Comment

Your email address will not be published. Required fields are marked *

Scroll to Top